
Export
How to export images, temperature data, and reports
CRITIR can export thermal images and temperature data in a variety of formats.
Export methods
There are three ways to export.
| Method | Operation | Use case |
|---|---|---|
| Export menu | Export button on the toolbar → Export Image | Export with fine-grained control over format and options |
| Right-click menu | Right-click in the image list → Export Image... | Quickly export the selected images |
| Drag & drop | Drag a thumbnail from the image list and drop it into a folder, Word, etc. | Hand a PNG image directly to Explorer, Word, and other applications |
Output formats
| Format | Extension | Contents |
|---|---|---|
| PNG | .png | Thermal image with the colormap applied. Color bar, histogram, and measurement markers can be overlaid |
| TIFF | .tif | 32-bit floating-point temperature data, for analysis or post-processing in other software |
| CSV | .csv | Temperature data as text, openable in Excel and other spreadsheet software |
The TIFF and CSV formats are only available when a thermal image is present.
Export image dialog
Select Export menu → Export Image on the toolbar to open the export dialog.
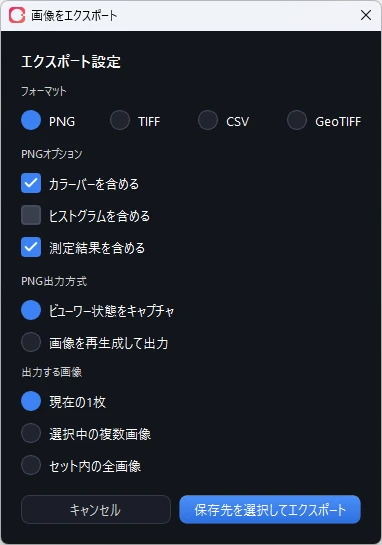
Choosing the output format
At the top of the dialog, choose PNG / TIFF / CSV / GeoTIFF. The options in the lower part of the dialog change according to the selected format.
GeoTIFF exports a georeferenced orthomosaic. See GeoTIFF export for details.
PNG options
The following options are available when the PNG format is selected.
Overlays
| Option | Description | Default |
|---|---|---|
| Include color bar | Overlay the temperature scale bar on the image | On |
| Include histogram | Overlay the temperature distribution histogram | Off |
| Include measurement results | Overlay measurement markers and labels | On |
Output method
| Mode | Description |
|---|---|
| Capture Viewer State | Capture the current viewer display as-is. Single image only |
| Regenerate Image and Export | Regenerate the image from the saved display settings. Supports batch export of multiple images |
Export scope
| Scope | Description |
|---|---|
| Current Image | Only the image currently shown in the viewer |
| Selected Multiple Images | The images selected in the image list (shown only when multiple images are selected) |
| All Images in Set | Every image in the current set |
When exporting multiple images, choose a folder as the destination.
Right-click and drag & drop export
Both Export Image... in the right-click menu and drag & drop from the image list export PNG images directly, without opening a dialog.
- Right-click: A folder selection dialog appears, and the PNGs are saved to the selected folder
- Drag & drop: Drag a thumbnail and drop it into Explorer, Word, or other applications
Image export settings
The overlays included in the output can be changed in the Settings → Image Export tab. These settings apply to both right-click export and drag & drop export.
| Option | Description | Default |
|---|---|---|
| Include color bar | Overlay the temperature scale bar | On |
| Include histogram | Overlay the histogram | Off |
| Include measurement results | Overlay measurement markers | On |
These settings are kept application-wide. They are independent of the options in the Export Image dialog.
Automatic saving of measurement-annotated JPEGs (_critir.jpg)
For every image you measure, a JPEG with the measurement results burned in is automatically saved next to the original image. No export operation is needed.
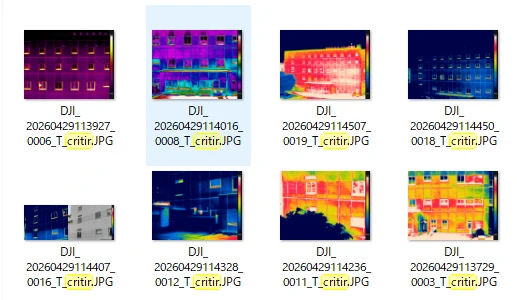
The file name is the original thermal image name with _critir appended (for example, DJI_20260429113927_0006_T.JPG → DJI_20260429113927_0006_T_critir.JPG).
How to use it
The saved _critir.jpg is a regular JPEG image. Simply drag & drop it from Explorer into Word or Excel to paste it straight into reports and internal documents. It can also be attached to emails or shared in chat as-is.
Embedded temperature data
In addition to the visible JPEG image, _critir.jpg has the temperature data, measurement results, and temperature display settings embedded in it. Reopen it in CRITIR to analyze it again as a temperature-enabled image.
Ordinary image viewers and Word treat it as a normal JPEG image. The embedded data never interferes with viewing or pasting.
When it is saved
The file is saved automatically at the following moments, reflecting the display state and measurement results at that time.
- When you switch to another image
- When you exit the application
- When you switch the reference image in comparison mode
Saving runs in the background. If you switch projects or perform similar operations while a save is in progress, you may see a message such as "The operation was canceled because CRITIR is waiting for image saving to complete." Wait a few seconds and try again.
Report export
From the Export menu → Create Report on the toolbar, you can export an inspection report in PDF or Word format.
See Creating reports for template selection and detailed report settings.
HTML viewer export
From the Export menu → Export Viewer on the toolbar, you can export an interactive HTML viewer that runs in a browser. Anyone can review the images just by opening it in a browser — no CRITIR installation required.
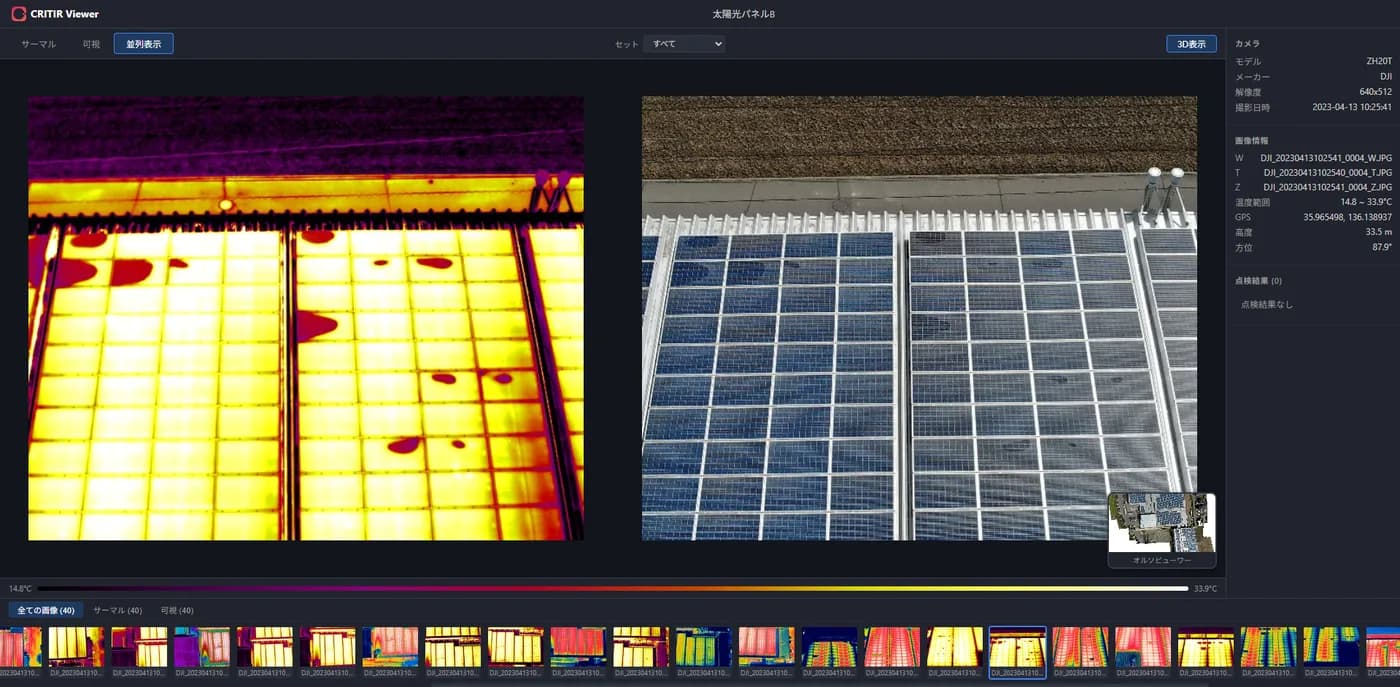
| Item | Description |
|---|---|
| Output Folder | Folder where the viewer bundle is saved |
| Folder Name | Name of the output folder (default: <project name>_viewer) |
| JPEG Quality | JPEG quality of the images (50–100%, default 85%) |
The exported viewer automatically bundles the contents of the project.
- Switching between thermal / visible / side-by-side views
- Measurement results (inspection results) and temperature information
- Orthomosaic and camera frames
- 3D model (a "3D View" button appears only if a model has been generated)
Whether visible, thermal, measurement, orthomosaic, and 3D data are bundled is determined automatically. There are no individual on/off settings; whatever has been generated is included as-is.
Exporting / importing projects
You can move a project to another PC or save it as a backup. These operations are performed from the project list screen.
Export
| Operation | Description |
|---|---|
| Right-click a project card → Export... | Export a single project as a .critix file (ZIP-compressed) |
| Settings ▾ → Export All Projects... | Export all projects to a specified folder in one batch |
Import
From Settings ▾ → Import Project..., choose the import source.
.critixfile — Load an exported.critixfile- Folder — Load a project folder directly
The entire project folder (including measurement results, orthomosaics, 3D data, and more) is covered. If a name conflicts during import, the project is renamed automatically; existing projects are never overwritten.
Exporting logs
From the Settings menu → Export Logs... on the toolbar, you can export diagnostic logs as a ZIP file.
The archive contains application activity logs and project information, and can be used for support when a problem occurs.