
What is an orthophoto? How it differs from a photo, explained with diagrams — from aerial maps to building facades
A visual introduction to orthophotos (orthoimages) and how they differ from ordinary photos. Covers relief displacement (why tall buildings lean outward), true orthophotos, the four steps from photos to an orthophoto, map orthos versus facade orthos, and the conditions where orthophotos fail — with real examples from Matsumoto Castle and a retaining wall.
Key points
- An orthophoto is a photo re-projected with parallel rays. It removes the perspective distortion and height-related shifts of an ordinary photo (a central projection), so the scale is the same everywhere
- In a photo, tall things lean outward. An orthophoto that also removes this lean is a true orthophoto
- It takes four steps: photos → camera positions and orientations → surface shape → re-projection
- Map orthos project straight down; facade orthos project horizontally into the wall. Same principle, different direction and reference plane
- They have weak spots: insufficient overlap, plain surfaces, reflections and moving objects
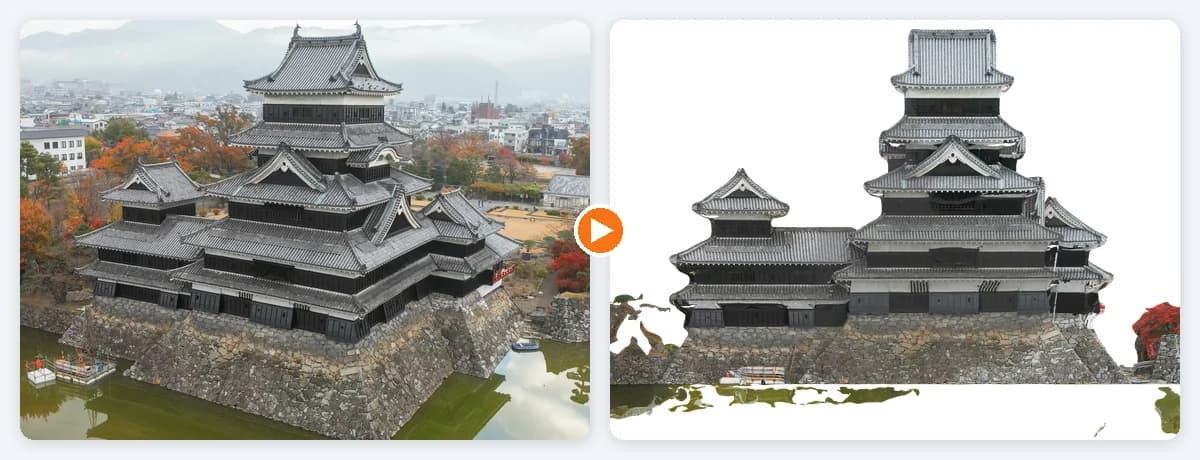
On the left is a drone photo of Matsumoto Castle; on the right, an orthophoto of the same face. In the photo, the stone base juts toward you and you can see the tops of the roofs. In the orthophoto, the roofs line up as flat horizontal bands, and you can read off the relative heights of the main and secondary keeps directly. Same building — so why do they look so different?
The "satellite view" on a map is not just a photo
Switch your map app to the aerial view and the roads line up neatly with the photo. It looks obvious, but simply laying ordinary photos side by side would never give you that.
Japan's national mapping agency, the Geospatial Information Authority of Japan (GSI), describes an orthophoto as an aerial photo converted so that position shifts in the image are removed and everything is shown at its correct size and position, tilt-free, as if seen from directly above — just like a map.
Put the other way around: an ordinary aerial photo contains position shifts, and as-is it will not line up with a map. So where do those shifts come from?
A photo is made of light that "meets at one point"
A camera forms an image by funneling light from all over the scene through a single point in the lens. This is called a central projection.
Because the rays converge on one point, near things appear larger and far things smaller. That is why a wall photographed at an angle turns into a trapezoid. In the left half of the diagram, four equal sections of wall come out wide in front and narrow at the back.
An orthophoto redraws the scene as if it had been captured with parallel rays square to the wall or ground — an orthographic projection. As in the right half, every section comes out the same width. A scale that does not change from place to place within the image is the single most important property of an orthophoto.
Tall buildings lean outward (relief displacement)
Central projection has another awkward trait. Even when you shoot straight down, tall objects appear to lean outward from the center of the photo.
Light from a rooftop travels at a slant toward the camera. Extend that same ray down to the ground, and it lands outside the building's footprint. In the photo, the roof shows up as if it were sitting at that spot on the ground.
The shift grows the farther the object is from the image center and the taller it is. GSI's explanation says the same: the higher an object is above the ground, and the closer it is to the edge of the photo, the larger the position shift.
A quick back-of-the-envelope
Suppose a camera pointing straight down shoots from 100 m above the ground. A 10 m building located 30 m from the point directly below the camera will have its roof appear about 3.3 m outward from its base (30 × 10 ÷ (100 − 10)). The same building directly below the camera would hardly shift at all. The lower you fly — as drones do — the bigger the lean for a building of the same height.
Look closely at the diagram and you will notice something else: the ground in the shadow of the leaning building does not appear in that photo at all. This "invisible ground" is the key to true orthophotos.
What is the difference between an orthophoto and a true orthophoto?
To build an orthophoto, each pixel is traced back to "where on the ground this light came from" and moved there. What shape you project onto changes the result.
- Standard orthophoto: uses elevation data for the bare ground only (a DEM, digital elevation model, or DTM). It removes shifts caused by terrain, but buildings are not part of the ground model, so roofs stay shifted outward and building sides remain visible
- True orthophoto: uses a surface model that includes buildings and other objects (a DSM, digital surface model). Roofs are re-projected at roof height, so they sit exactly on their footprints
A true orthophoto has one more job, though. The ground hidden behind leaning buildings is not in the original photo, so it has to be filled in from other photos that saw the same spot from a different angle. That calls for more overlap between photos; a technical report from the Japanese surveying firm Asia Air Survey notes that true orthophotos require capture at a higher overlap ratio than usual.
According to the same report, because a true orthophoto shows no building lean (no visible sides), it is expected to be useful in applications such as property tax assessment, where buildings and land must be read and measured accurately.
From photos to orthophoto: four steps
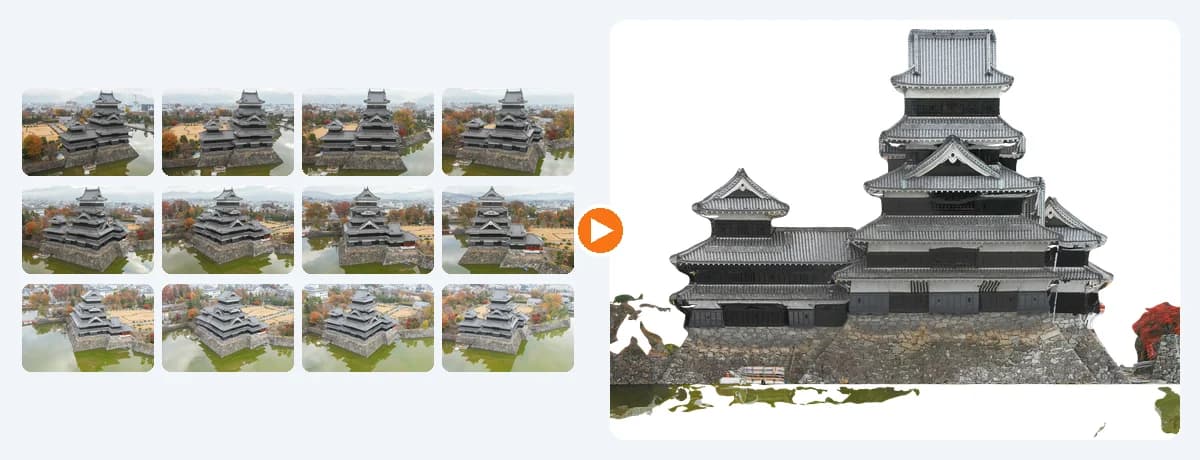
An orthophoto is made by "re-pasting" many photos. Whether the source is a survey aircraft or a drone, the skeleton is the same.
- Take the photos: shoot with overlap so that every spot appears in several photos
- Recover camera positions and orientations: find points shared between photos and work backward to where each photo was taken from and which way it was facing. For drone photos, a technique called SfM (Structure from Motion) is commonly used
- Determine the surface shape: decide what shape to project onto — the terrain, a surface including buildings, or a wall treated as a single plane
- Re-paste: for each point on the surface, find the photos that see it and bring over their pixel colors. Overlapping areas are blended so the seams don't show, producing one image
Step 2 is the crux. Once you know where each camera was and which way it pointed, you know which direction the light for every pixel came from. Combine that with the shape from step 3, and you know exactly where on the surface that light originated. An orthophoto is the result of tracing light paths backward.
Map orthophotos vs. building facade orthophotos
So far we have talked about maps. The same principle works on building walls — that is a facade orthophoto (also called an elevation ortho or wall ortho).
Only the projection direction and reference plane change.
| Map orthophoto | Facade orthophoto | |
|---|---|---|
| Projection direction | Straight down | Horizontally into the wall |
| Reference plane | Level ground | The wall plane |
| Image axes | East × north | Wall width × height |
| What you get | A photo that overlays a map | A photo that overlays an elevation drawing |
For a map, "straight down" is fixed by gravity. Walls, however, face different directions on every building and every face. A facade ortho therefore always needs a step that decides which face to project onto.
Relief matters too. Eaves, balconies and — in a castle — whole roofs jut out from the wall. If you treat the wall as one flat plane, those overhangs land in the wrong place, for exactly the same reason buildings lean in a DEM-corrected map ortho. For strongly three-dimensional subjects, re-projecting onto a 3D model (the actual surface shape) puts the overhangs where they belong.
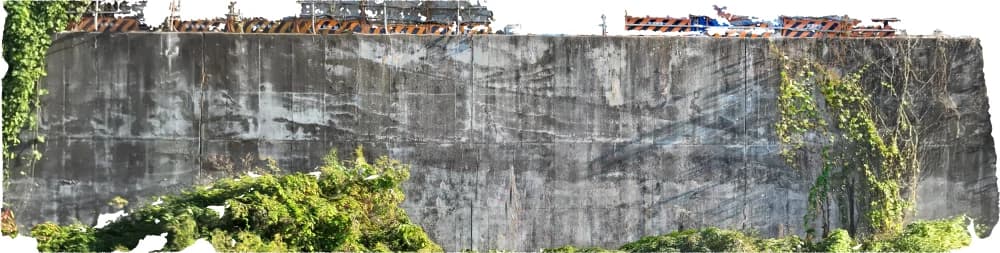
A long subject like this retaining wall never fits in a single photo. As an orthophoto, it lines up end to end at one consistent scale.
Why orthophotos are worth having
1. Consistent dimensions
The scale is the same everywhere, so you can compare lengths and areas directly on the image. In a photo, you cannot fairly compare the length of a crack in the foreground with one at the back just by how big they look.
Note that a consistent scale is not the same as knowing how many meters it is. To get real-world units, you supply a scale — from GPS-tagged camera positions or a known length measured on site (how scale works).
2. Overlays on drawings
Just as a map orthophoto overlays a map, a facade orthophoto overlays an elevation drawing. Transferring defect locations to the drawing or taking off quantities becomes much easier.
3. The whole picture at once
You see the condition of an entire wall in one image. Instead of flipping through dozens of photos one by one, you can tell at a glance where and how much.
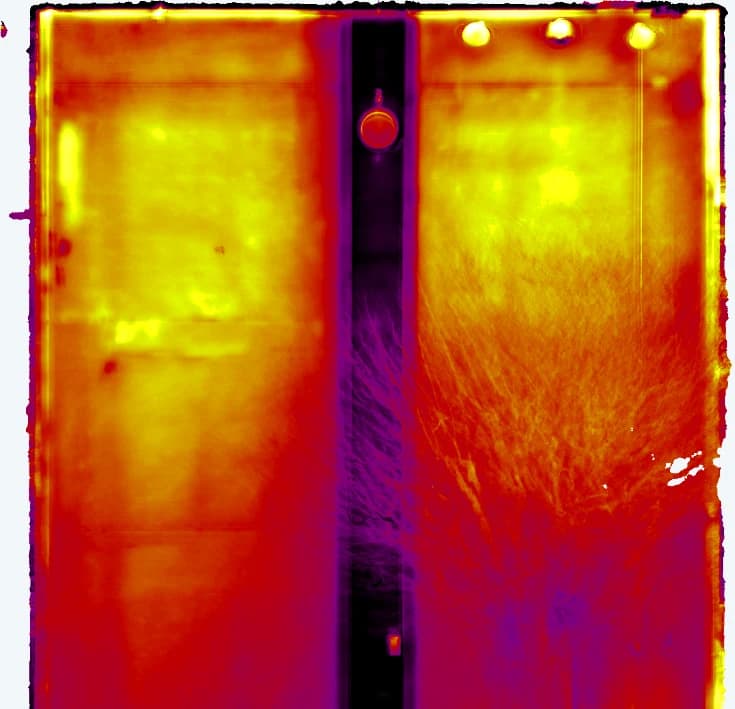
If you capture thermal (infrared) images alongside the visible ones, you can turn the temperature distribution into an orthophoto of the same shape. In facade inspection, that lets you see where temperature anomalies — such as those caused by delaminated tiles — sit within the wall as a whole.
Five conditions where orthophotos struggle
Orthophotos are not magic. The whole method rests on finding the same points in different photos, so anything that makes that hard is a weak spot.
- Not enough overlap: if a spot does not appear in several photos, camera positions and orientations cannot be solved. Pix4D, a photogrammetry software vendor, recommends at least 75% frontal and 60% side overlap in the general case, and at least 90% both ways for thermal imagery
- Plain, featureless surfaces: a bare white wall, snow or sand gives nothing to match between photos. Pix4D lists snow and sand as having little visual content and recommends increasing overlap
- Reflective or transparent surfaces: water, glass and shiny metal change appearance with viewing angle. Pix4D states that open water is nearly impossible to reconstruct
- Moving objects: cars, people and branches swaying in the wind are in a different place in each photo, which tends to leave odd seams
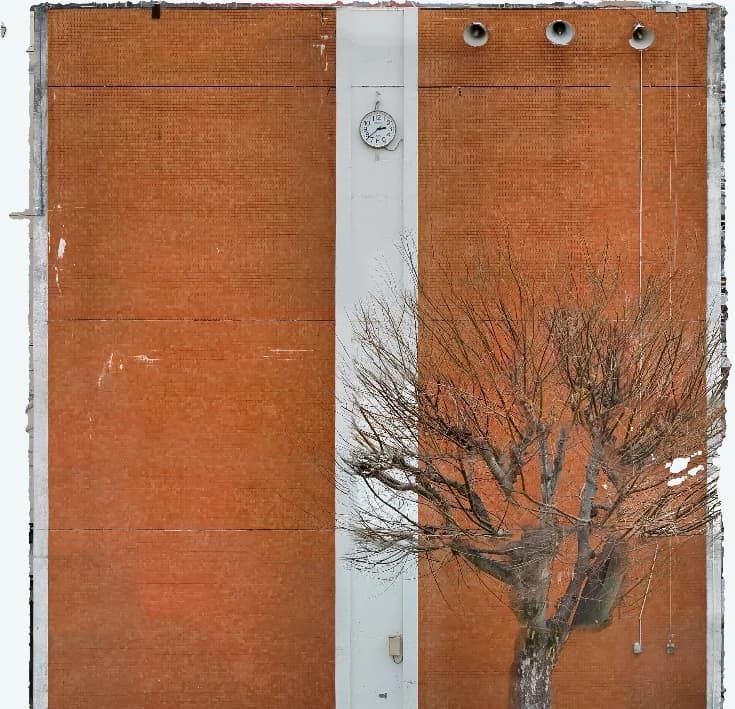
- Far off the reference plane: a tree or power line in front of a wall looks "painted on" the wall plane. The tree in the image below is an example
What you can do before you shoot
Plan generous overlap; on plain surfaces, include textured surroundings (window frames, joints, neighboring walls) in the frame; and avoid compositions where water or glass fills most of the image. These three steps alone prevent a lot of failures.
Making facade orthophotos of buildings
Given these principles, making an orthophoto of a building wall means recovering camera positions from the photos, choosing the face to project onto, and using a 3D model when the surface has strong relief.
CRITIR, inspection software for building and infrastructure surveys, runs this whole process automatically from drone or ground photos.
- Planar ortho: treats a wall or roof as a single plane. Pick from candidate planes detected automatically, or click a face on a photo to specify it
- 3D model ortho: builds a 3D model and lets you specify the face, extent and depth to project with a box. Suited to buildings with strong relief, or to producing several faces from one building
- Visible and thermal: generates visible and thermal orthophotos together
- Real-world scale: specify a known length with two points, and measurements on the orthophoto, 3D model and original photos all become real-world dimensions
For the hands-on steps, see our article Generate facade and wall orthoimages automatically with CRITIR and the documentation chapters Ortho generation, Ortho viewer and Scale settings. For an overview of CRITIR, visit the product page.
Frequently asked questions
- Are "orthophoto" and "orthoimage" the same thing?
- Yes. Both refer to an orthographically projected (orthorectified) image. When made from aerial photos for mapping, it is sometimes called a photo map.
- Is everything in an orthophoto accurate to measure?
- The uniform scale applies to things on the reference surface (the ground for a map ortho, the wall for a facade ortho). Objects far from it — rooftops in a standard ortho, a tree in front of a facade — appear at the wrong position or size. And to get real-world units, you still need a scale from GPS or a known length.
- Is a true orthophoto always better?
- It is more accurate because buildings do not lean, but it needs a surface model that includes buildings and more overlap to fill in hidden ground. Choose based on your purpose and capture conditions.
- Can I make an orthophoto from drone photos?
- Yes. With overlapping photos, SfM recovers the camera positions and orientations, and an orthophoto can be generated. For walls, shoot toward the wall and build a facade orthophoto from those photos.
Summary
- An ordinary photo is a central projection: perspective distorts it, and tall things lean outward
- An orthophoto re-projects with parallel rays using camera positions, orientations and the surface shape, so the scale is uniform
- Removing the building lean as well gives a true orthophoto; hidden ground is filled from other photos
- Map orthos project straight down; facade orthos project horizontally into the wall. Only the direction and reference plane differ
- Insufficient overlap, plain or reflective surfaces, moving objects and things off the reference plane are weak spots — and most can be mitigated at capture time
Sources
- Geospatial Information Authority of Japan, "About orthoimages" (Japanese)
- Geospatial Information Authority of Japan, "Digital Japan Basic Map (Orthoimagery)" (Japanese)
- Asia Air Survey, "Automating photo map production with true orthophotos" (For the Future 2025 technical report, Japanese)
- Pix4D, "Image acquisition"
- Pix4D, "Best practices for image acquisition and photogrammetry"
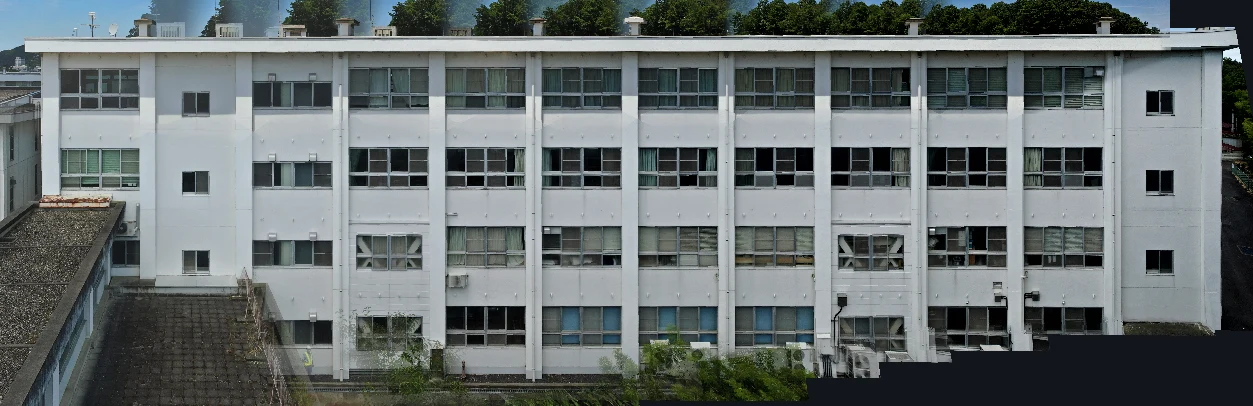
Generate facade and wall orthoimages automatically with CRITIR
A clear walkthrough of how facade and wall orthoimages are built from drone or ground-camera shots, and how CRITIR simplifies the process. Where RealityCapture (RealityScan) and Metashape require significant manual work for vertical surfaces, CRITIR automates the pipeline — including thermal orthoimages — to streamline facade inspections and defect surveys.
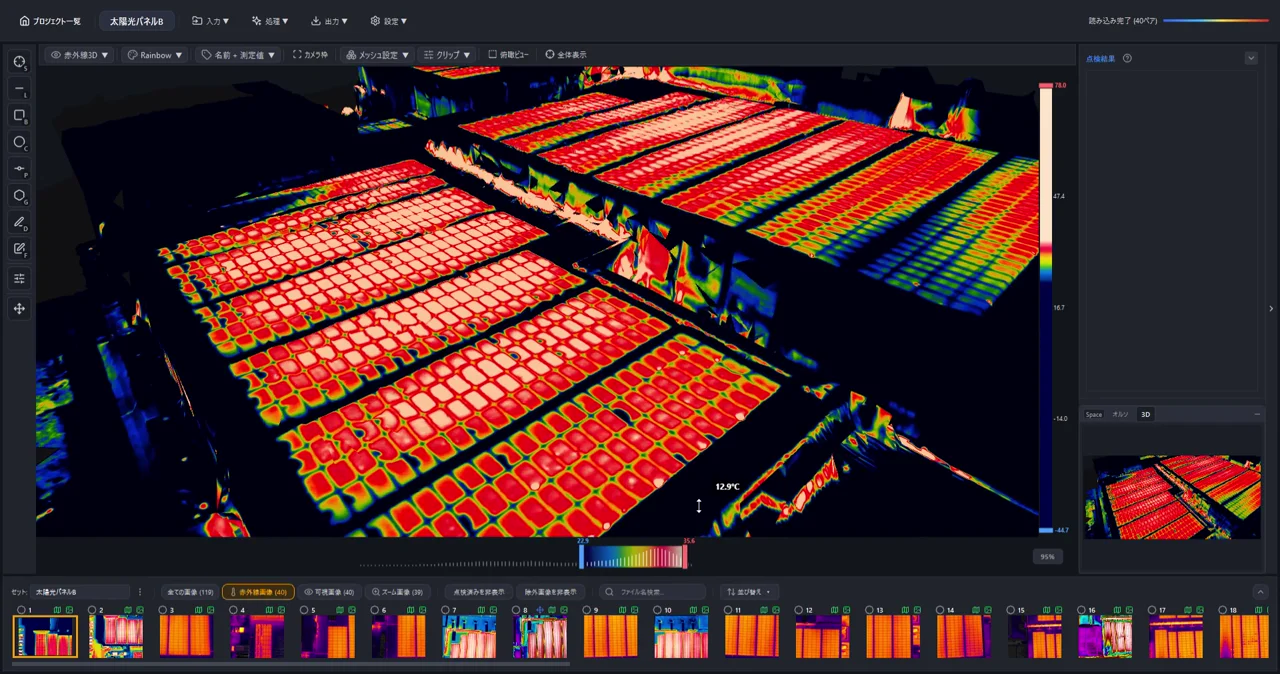
Generate 3D Models from Drone Photos — Build Temperature-Colored (Thermal) 3D Models with CRITIR
Learn how to automatically generate 3D models of buildings and structures from drone or ground-camera photos. With CRITIR, you get a visible-light 3D model plus a temperature-colored thermal 3D model, all linked to measurements and report output — streamlining inspection documentation for complex facades, equipment, and solar panels.
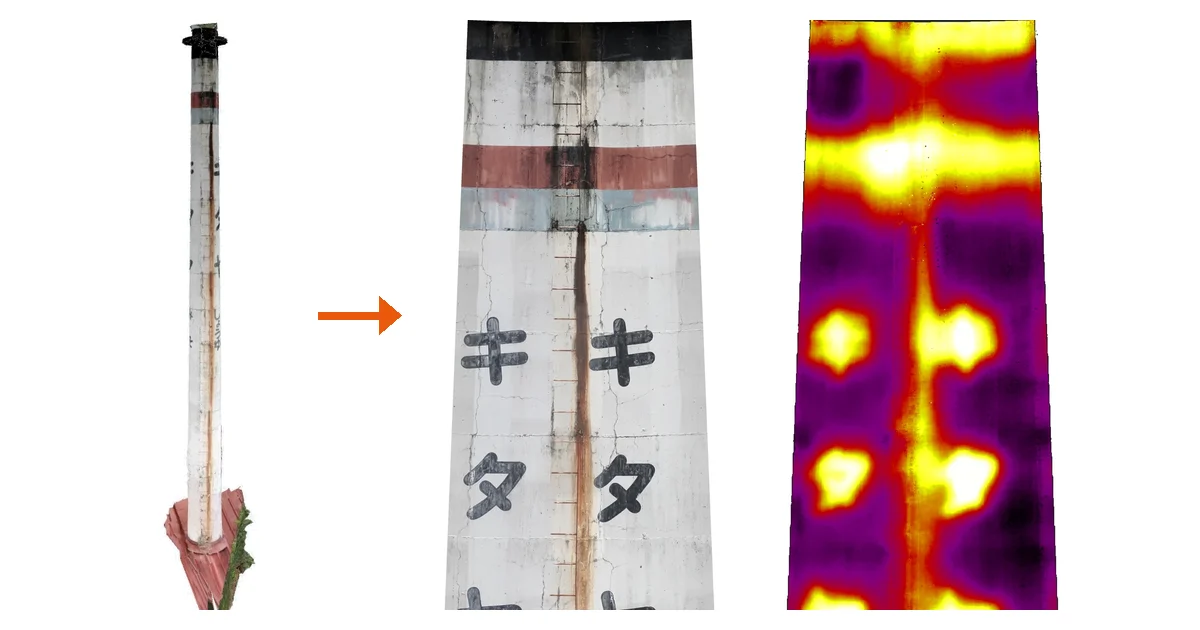
Chimney and tank inspection on one unwrapped image: opening up the photos you took all the way around
Inspecting chimneys and tanks means you can never see the back, the photos split into dozens of shots, and it is hard to say where anything is in a report. This article explains the unwrapped development drawing (a rectangle for a cylinder, a fan for a tapered chimney), how such an image is built from photos, and what an infrared unwrap can and cannot tell you, using a real chimney as the example.