Generate facade and wall orthoimages automatically with CRITIR
A clear walkthrough of how facade and wall orthoimages are built from drone or ground-camera shots, and how CRITIR simplifies the process. Where RealityCapture (RealityScan) and Metashape require significant manual work for vertical surfaces, CRITIR automates the pipeline — including thermal orthoimages — to streamline facade inspections and defect surveys.
Key points
- A facade / wall orthoimage is an orthographic projection of a building's exterior wall viewed straight on.
- The underlying pipeline:
captured photos → camera pose estimation → 3D geometry → orthographic projection onto a reference plane. - In RealityCapture / Metashape, it takes work: you need to manually define the projection plane, set up masks and ROIs, and often edit meshes — extra steps specific to vertical surfaces.
- CRITIR automates this: wall orthoimages are generated automatically from drone or ground-camera shots. Thermal images are supported too, dramatically cutting the time spent on facade inspection reports.
What is a "facade / wall orthoimage"?
An orthoimage is an image where perspective distortion has been removed, so the scene is shown as if viewed straight on (from directly above, or directly in front) at a uniform scale.
- Horizontal orthoimage: the familiar orthoimage of the ground or terrain, widely used in surveying and GIS.
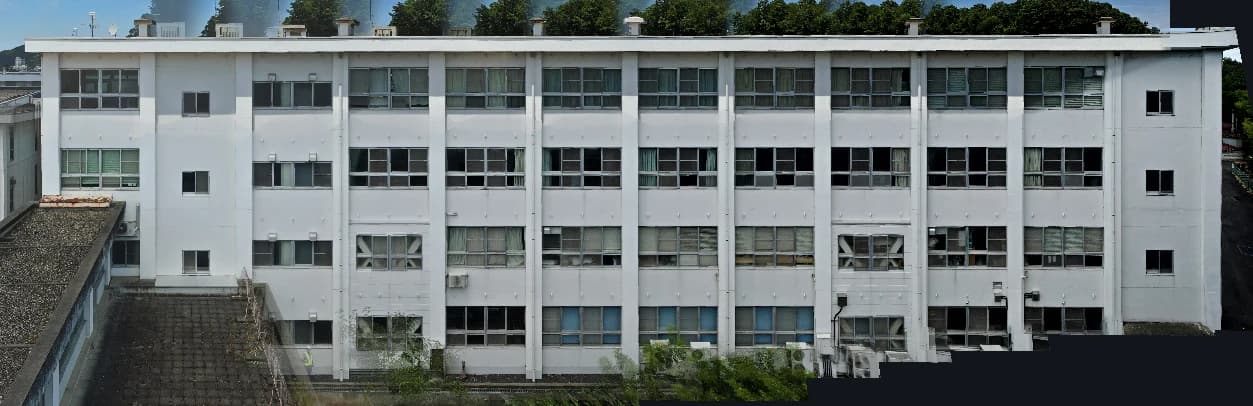
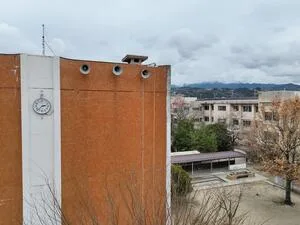
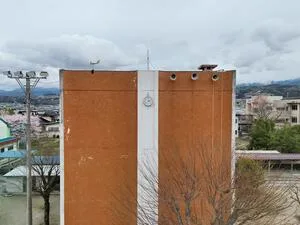
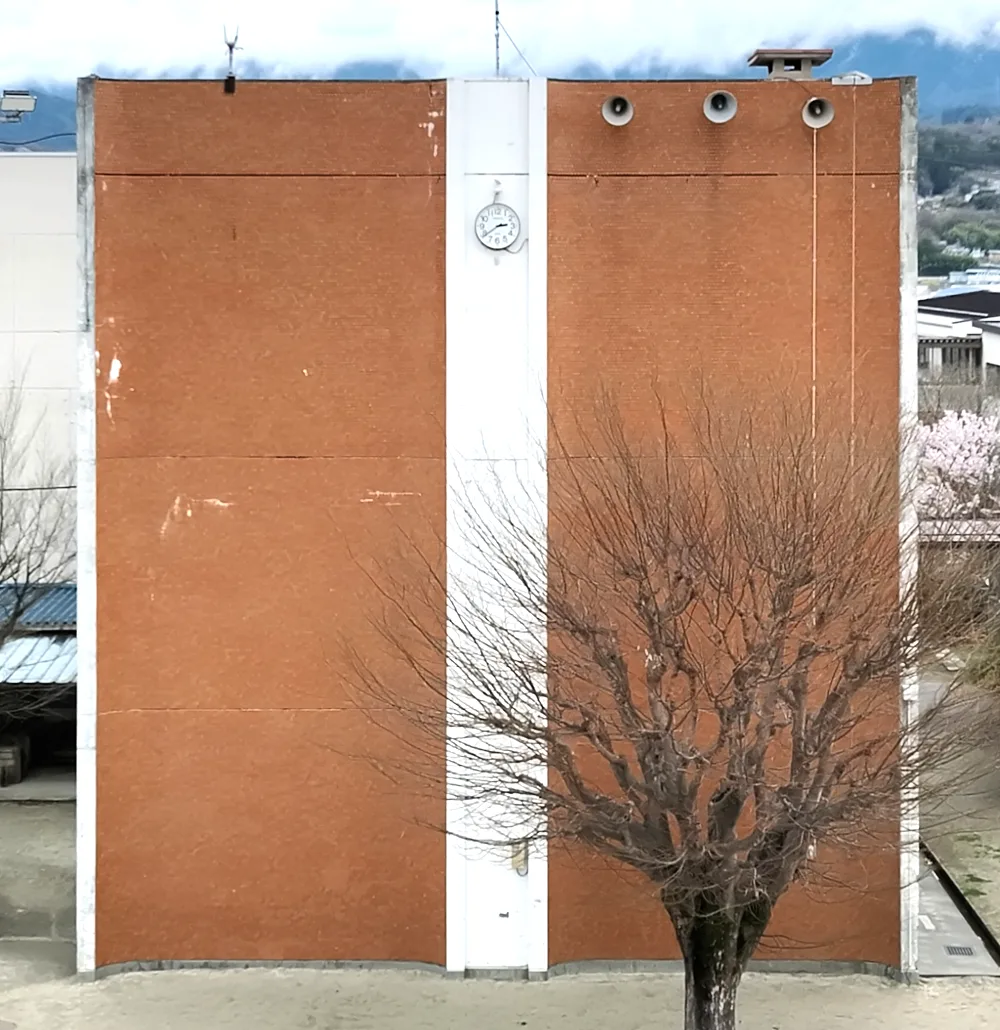
- Facade / wall orthoimage: an orthoimage of a building's exterior wall (vertical surface), used for facade inspections, defect surveys, and facade repair planning.
A facade orthoimage is, in effect, an elevation drawing generated automatically from drone photos. By stitching the captures into a single image at a uniform scale, you can see the full distribution of defects across the building while preparing quantity take-offs and reports.
How facade and wall orthoimages are built
First, a look at how orthoimages are generated in general.
The basic flow
Orthoimage generation typically follows this pipeline:
Captured photos → Camera pose estimation → 3D geometry (point cloud / mesh) → Orthographic projection onto a reference planeGeneral-purpose photogrammetry software such as RealityScan (formerly RealityCapture) and Metashape generates orthoimages using these steps:
- Feature matching: extract and match common feature points across multiple images.
- Camera pose estimation (SfM): back-solve where each image was captured from and in what direction.
- 3D surface construction: build a point cloud → mesh, or a DEM (digital elevation model).
- Projection onto the reference plane: project each image onto a user-chosen plane → compose a single orthoimage.
Wall orthoimages in traditional (general-purpose photogrammetry) software
With that background, here's how typical software produces a wall orthoimage.
RealityScan (formerly RealityCapture)
RealityScan's strength is that orthoimage projection direction is freely configurable. To make a wall orthoimage, the flow looks like this:
- SfM + mesh reconstruction + texturing
- Limit the region of interest to the wall area.
- Set the projection direction along the wall's surface normal.
- Export the orthoimage.
The catch: you can get high-precision orthoimages, but mesh reconstruction and texturing take time and involve a lot of manual steps.
Agisoft Metashape
Metashape likewise generates orthomosaics by projection onto a DEM or mesh. Wall orthoimages require manual definition of the projection plane, and getting a stable result takes a fair amount of know-how.
CRITIR generates wall orthoimages automatically
CRITIR is a thermal and visible image analysis app designed around the day-to-day needs of facade inspection work. Its pipeline is built specifically to solve the issues with general-purpose photogrammetry tools above.
Wall orthoimages are generated automatically — no tricky settings, no manual work.
What makes CRITIR's wall orthoimage feature different
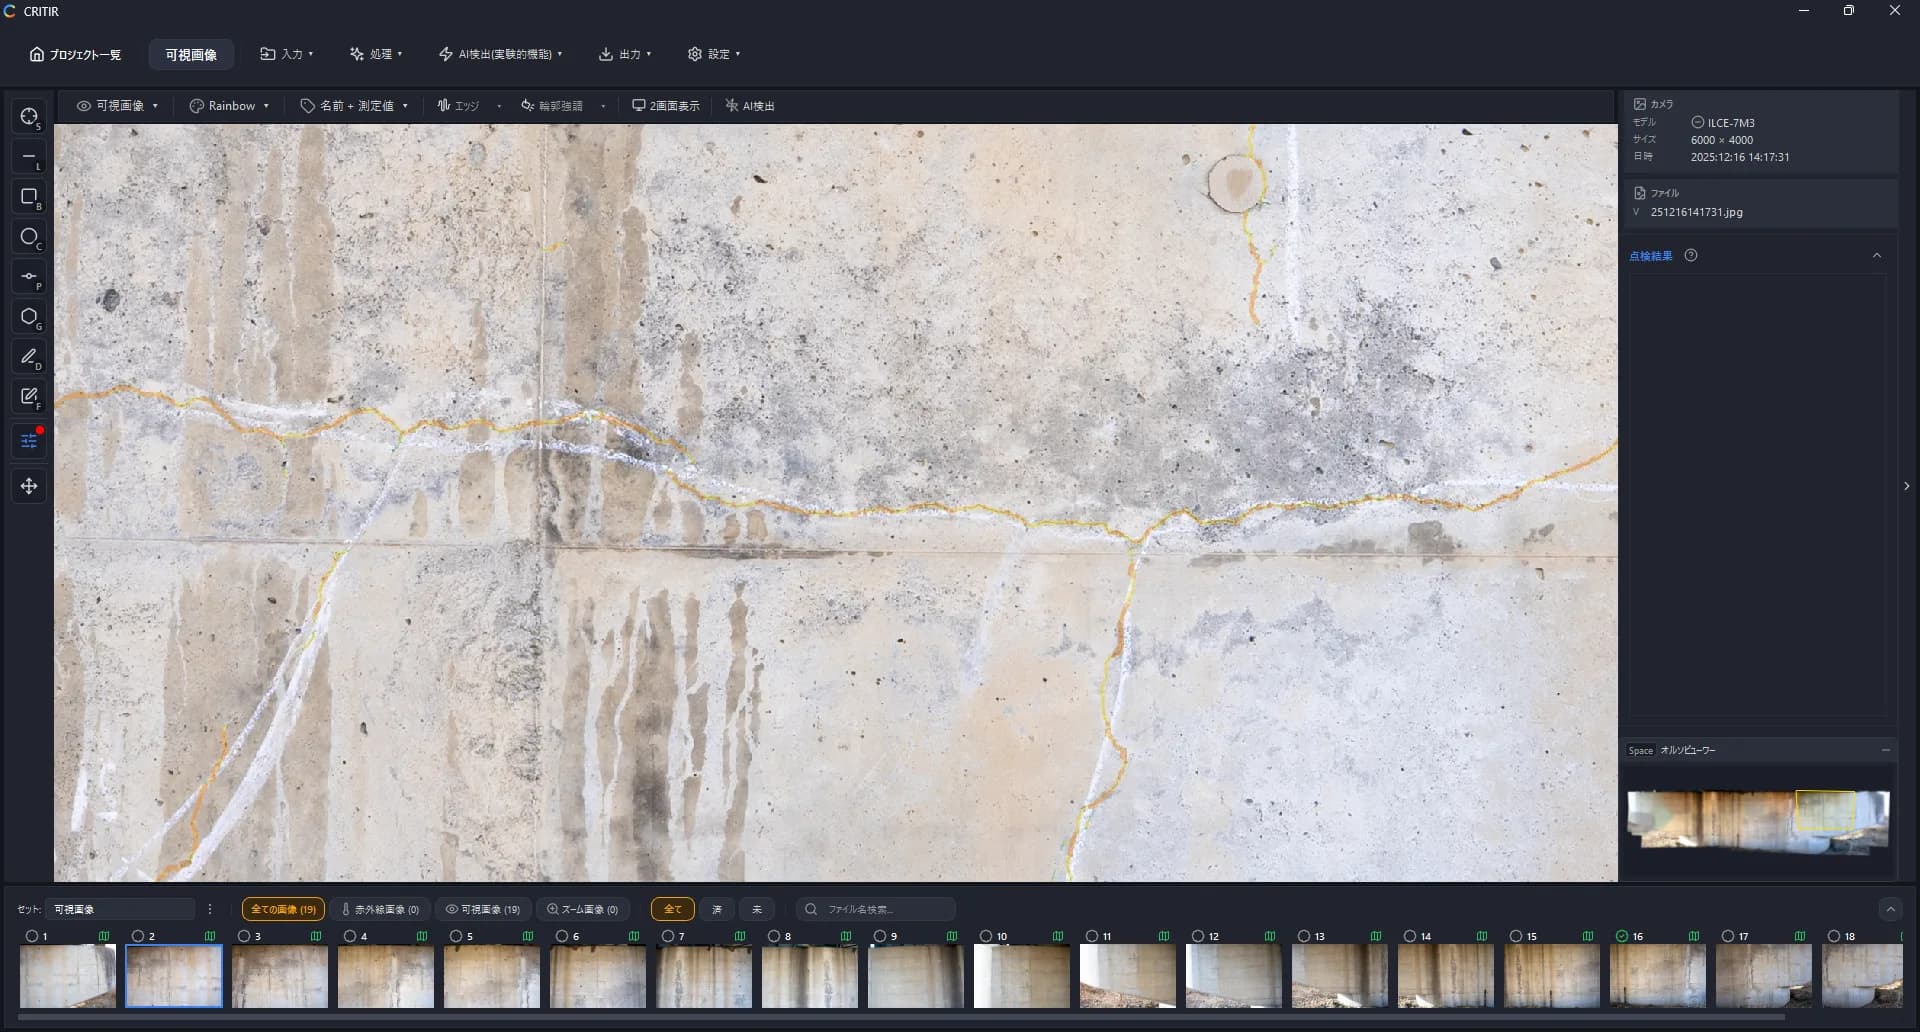
- Automatic reference-plane estimation: from the SfM-derived 3D point cloud and camera view directions, CRITIR automatically detects the wall's surface normal and tilt to estimate the reference plane.
- Pick the orthoimage from a set of candidates: CRITIR automatically generates several orthoimage previews from the estimated plane. Just pick the best one.
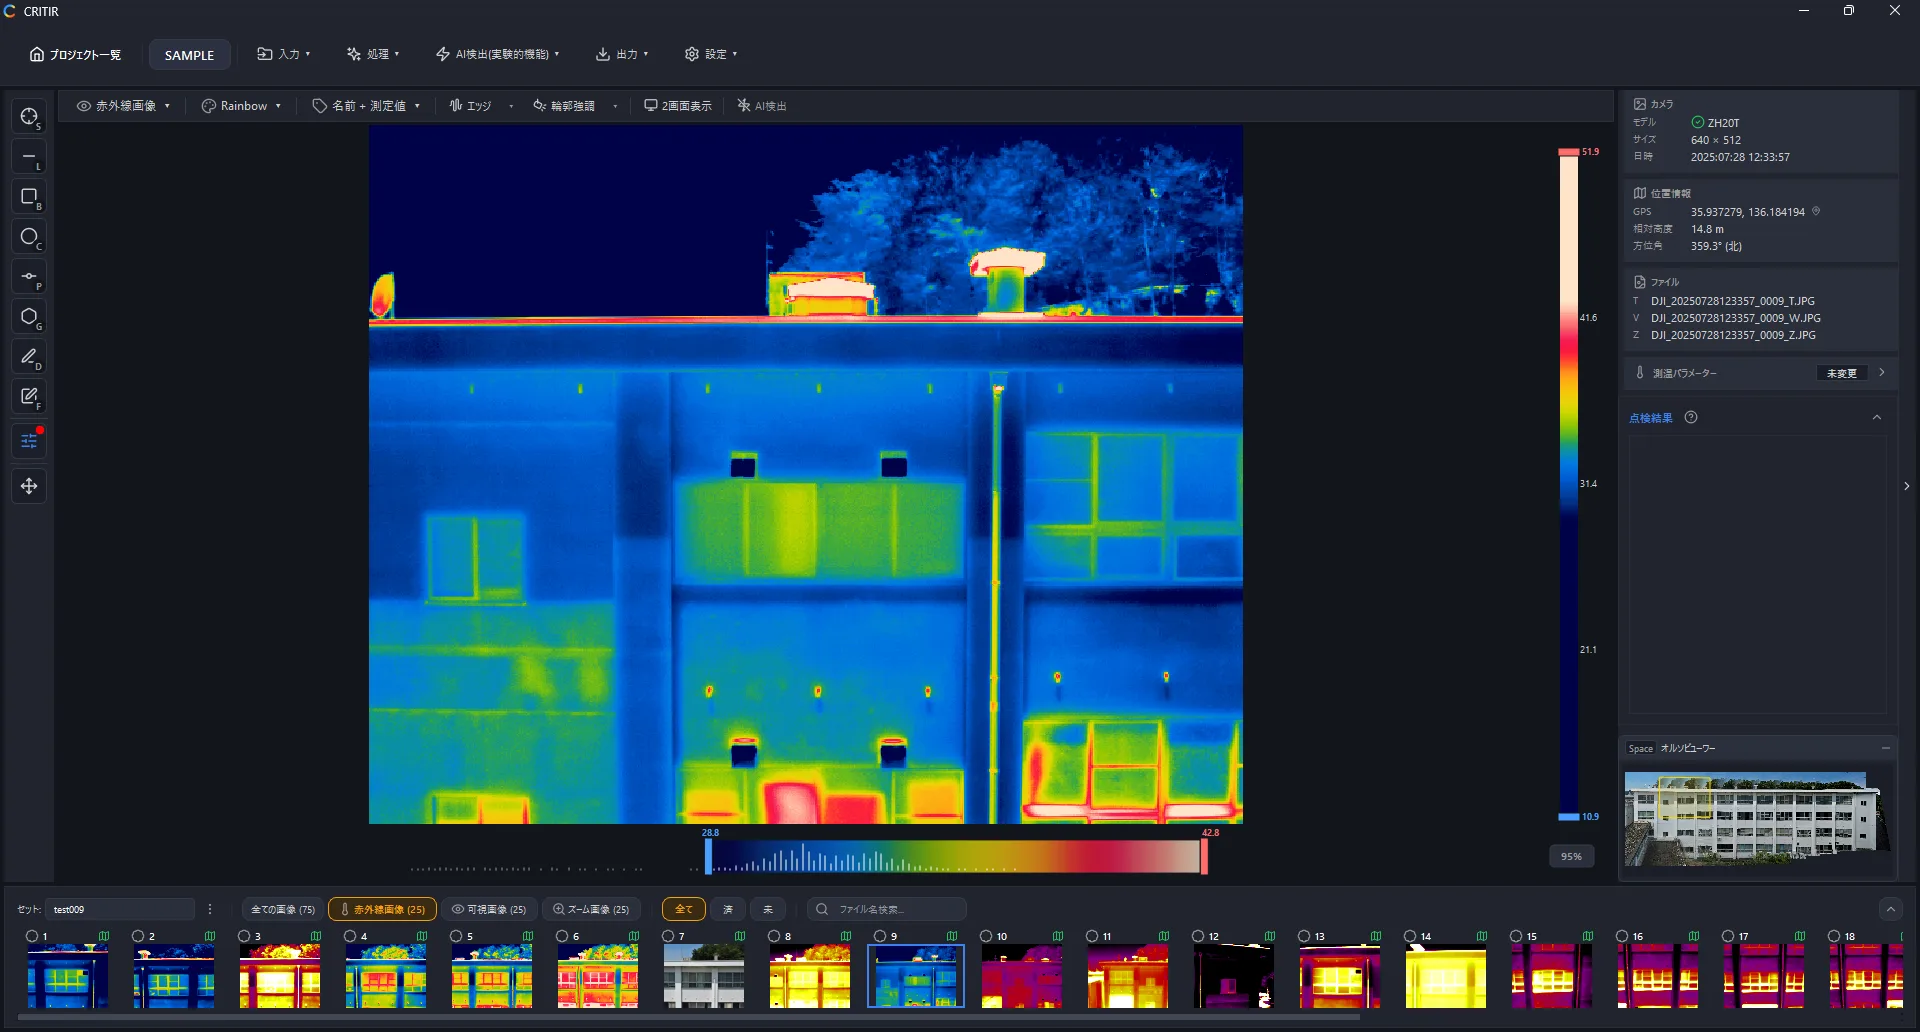
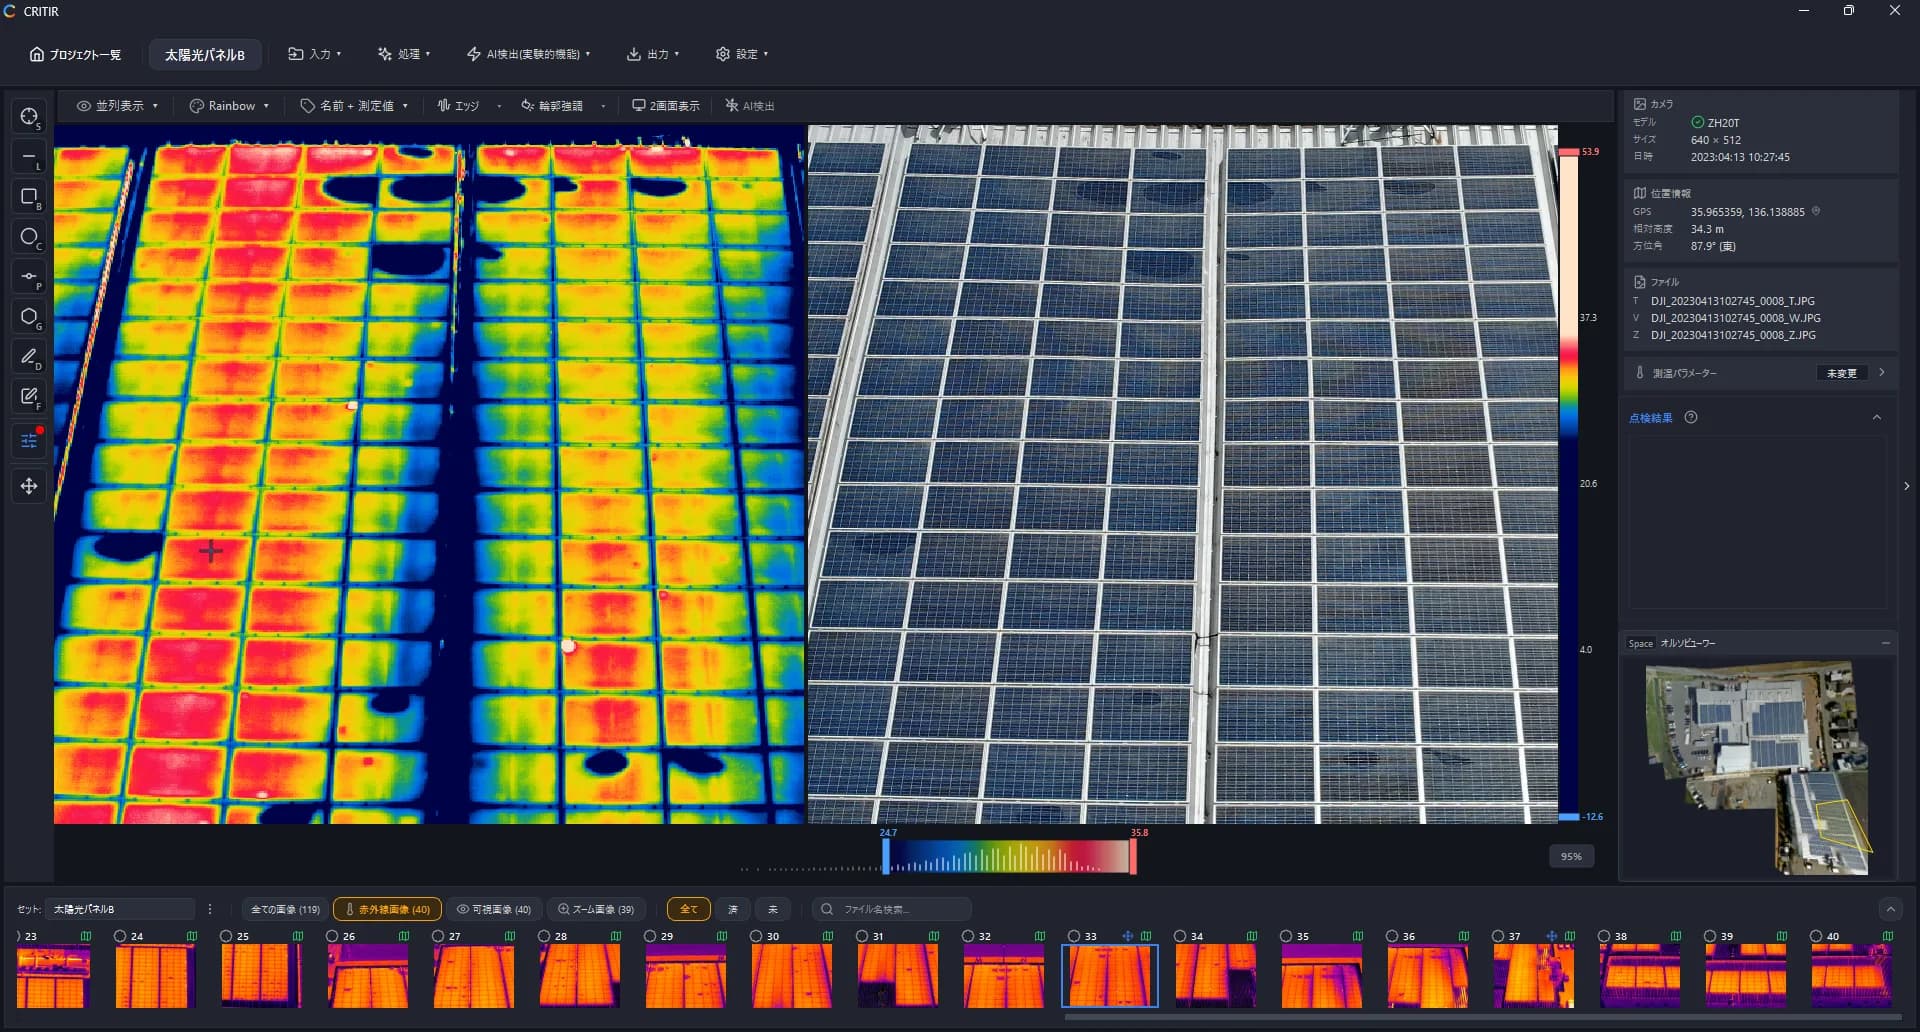
- Thermal-image support: thermal images are projected using the geometry estimated from visible images, producing a thermal wall orthoimage.
What you gain from wall orthoimages in CRITIR
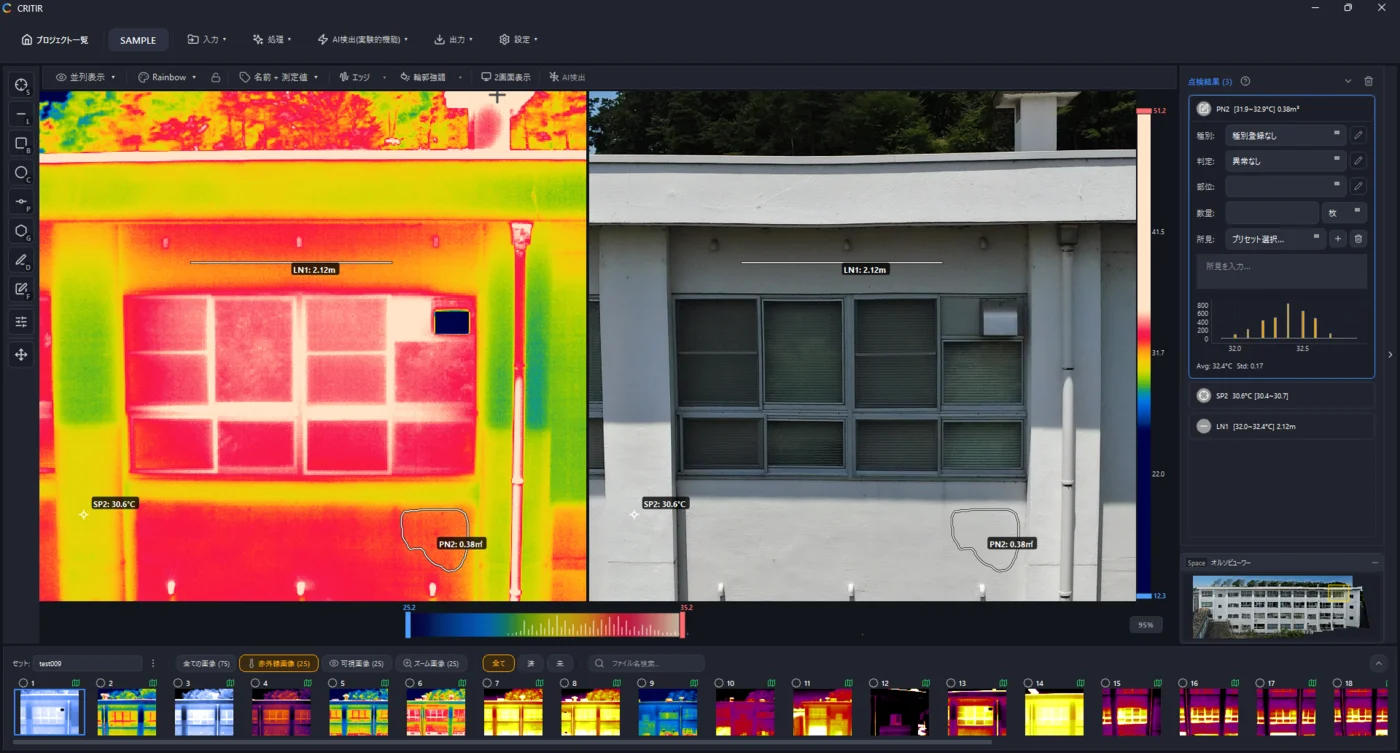
Measurements are auto-projected onto the wall orthoimage
In CRITIR, measurement points placed on a captured image — temperature spots, defect regions — are automatically projected onto the wall orthoimage as well.

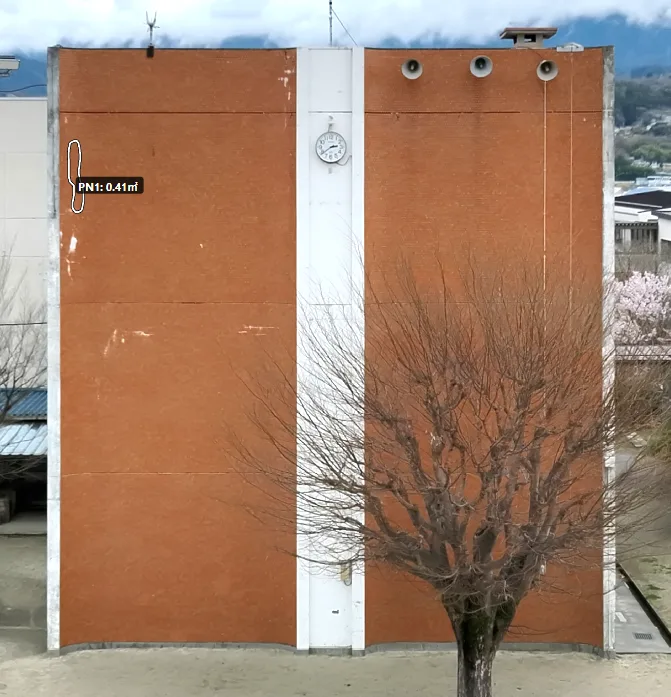
- A measurement placed on a captured image appears at the matching location on the wall orthoimage.
- See the full distribution of defects across the whole building and cross-reference with individual captures.
- Defect lengths and areas are computed automatically for quantity take-off.
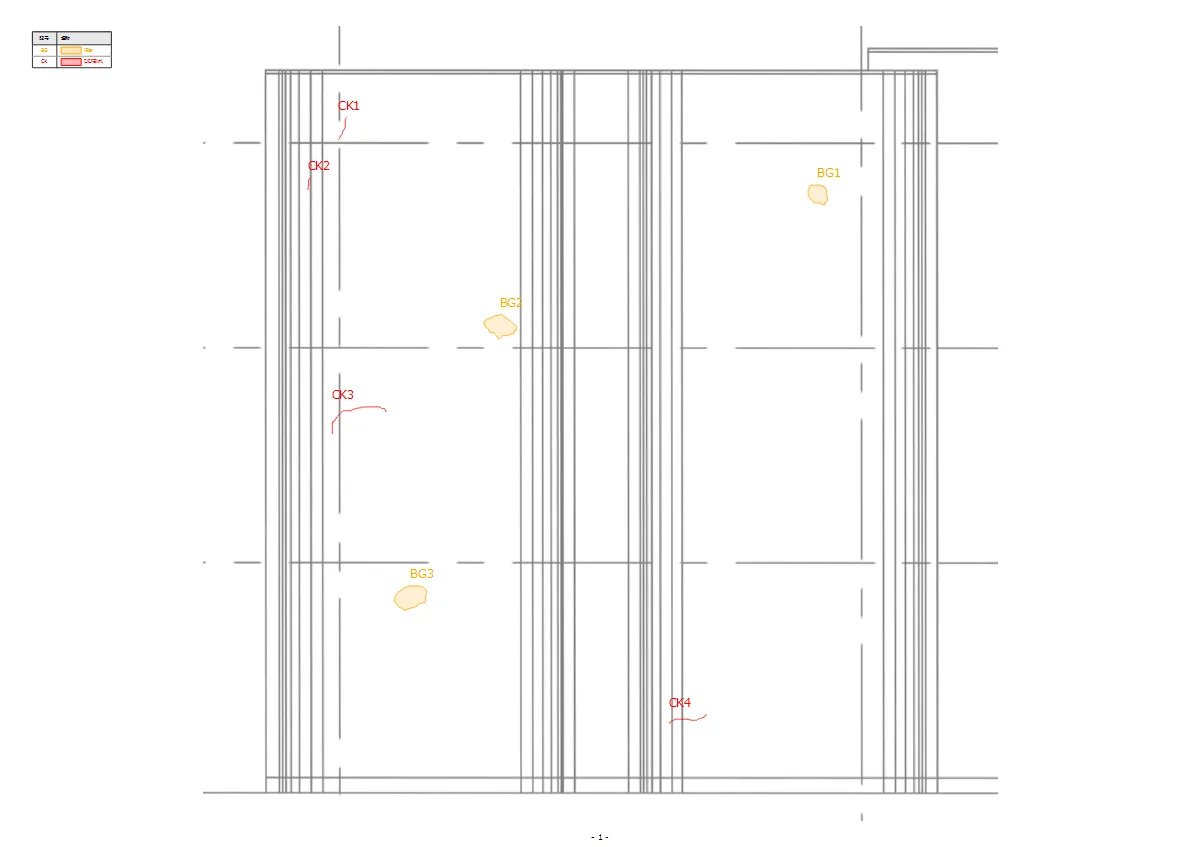
Measurements are auto-projected onto CAD drawings
In CRITIR, you can overlay CAD drawing files or drawing images (DXF / PDF / JPG, etc.) on the generated orthoimage.
That means measurements are projected onto the drawing as well, not just onto the orthoimage — no more manually marking defect positions in a CAD tool.

Connected to report output for end-to-end repair planning
CRITIR includes report templates that produce reports directly from orthoimages, measurements, and drawing projections. Built-in templates cover photo logs, thermal inspections, defect maps, and quantity-of-defects tables — the formats most often used on real sites.
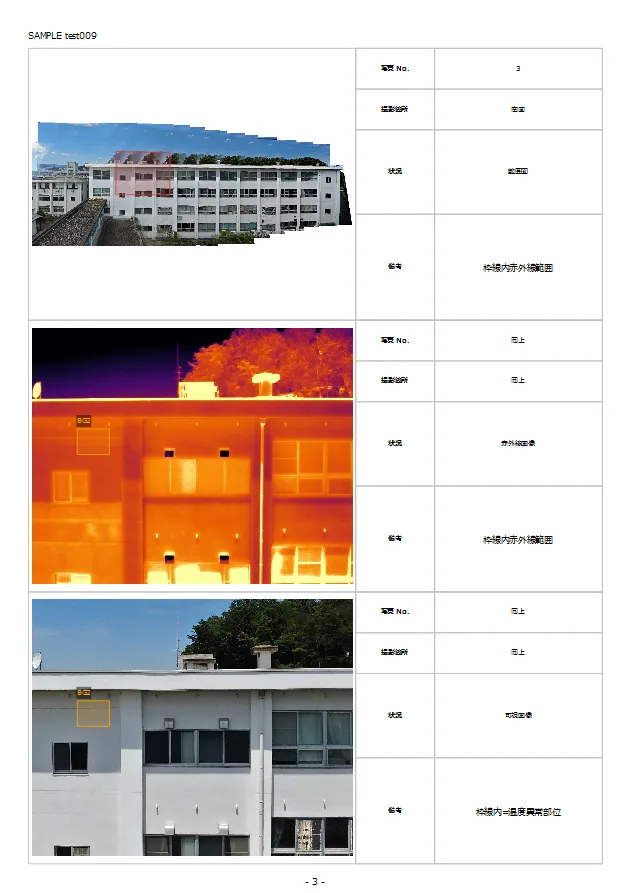
- Defect areas and quantities drawn on the orthoimage are reflected in the take-off table automatically.
- Captured images, the orthoimage, and CAD drawings are integrated into a single report seamlessly.
- No need to move between Word and Excel — everything through to the base materials for a repair plan is produced in one place.
Because capture → analysis → report all happen in a single app, the labor per project drops significantly.
Use cases that benefit most
Facade inspections and repair surveys
Ideal for facade inspections of apartments, office buildings, and warehouses where you want to see the defect distribution across the entire building at facade-elevation scale. Combine the orthoimage with hammer-test results to produce take-off materials for the repair scope.
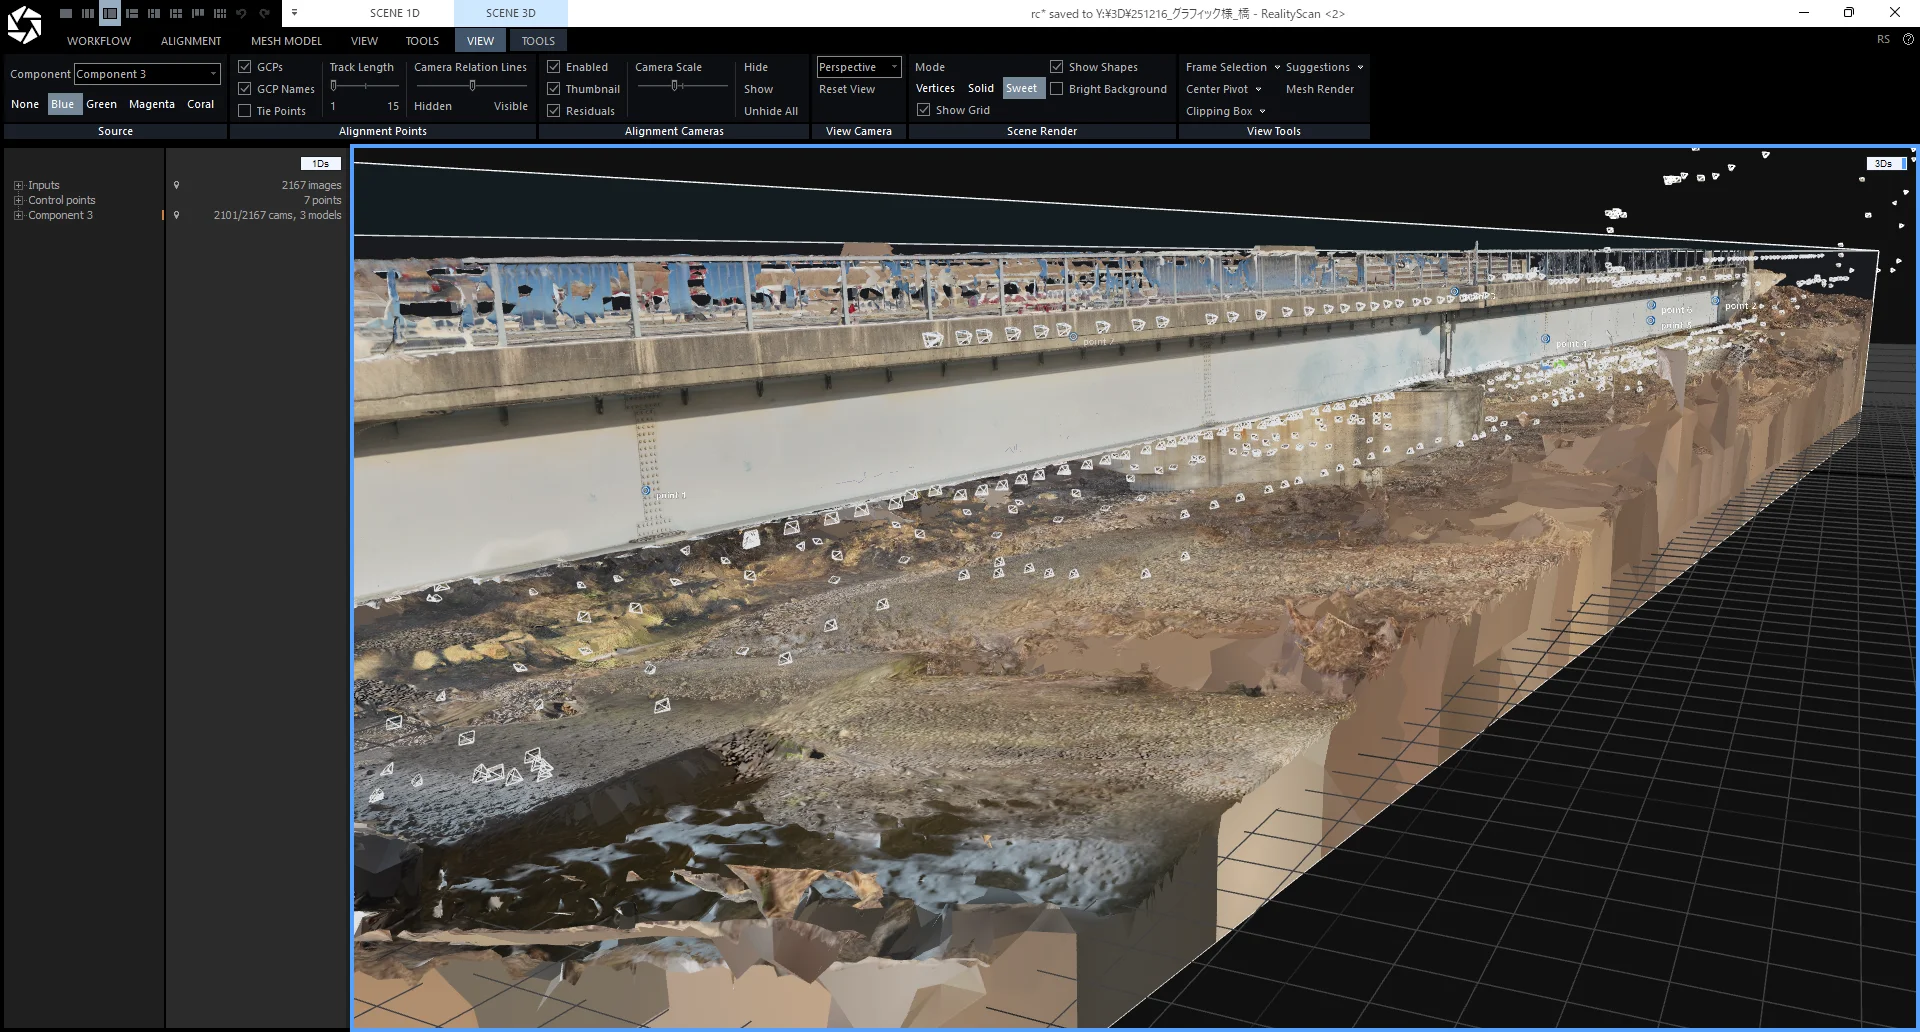
Bridge inspections
A bridge's side surfaces (main girders, the underside of the deck, piers) are inspection targets that can't be captured well with a ground-facing horizontal orthoimage. CRITIR generates side-facing orthoimages automatically from drone captures of bridge sides, so cracks, water stains, and delamination can be viewed across the structure on a single image. Combined with thermal imaging, you can also map internal delamination distributions onto the elevation orthoimage — useful as a reference against hammer-test results.
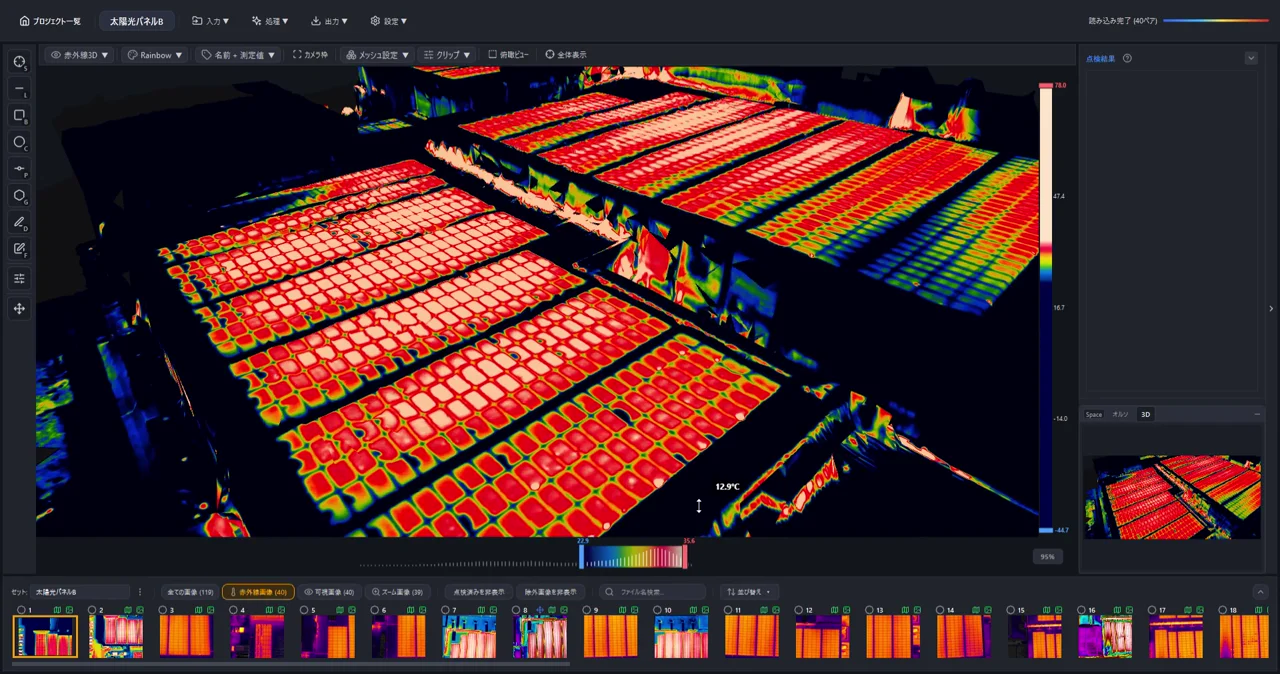
PV (solar panel) inspections
CRITIR's orthoimage generation is built to project onto any plane, not just walls or bridge sides. That means the sloped panel surfaces of ground-mounted utility-scale solar farms and roof-mounted arrays can be turned into orthoimages too.
- See the distribution of hot spots, cluster failures, and PID across the entire array at a glance.
- Generate panel-surface orthoimages from both thermal and visible images, pinning anomalies to drawing-based positions.
- Tie string-level anomaly distribution directly into the take-off materials in your report.
Walls, bridge sides, panel surfaces — CRITIR's strength is automatically finding the right reference plane for all of them.
The CRITIR facade / wall orthoimage workflow
Creating a wall orthoimage in CRITIR is straightforward:
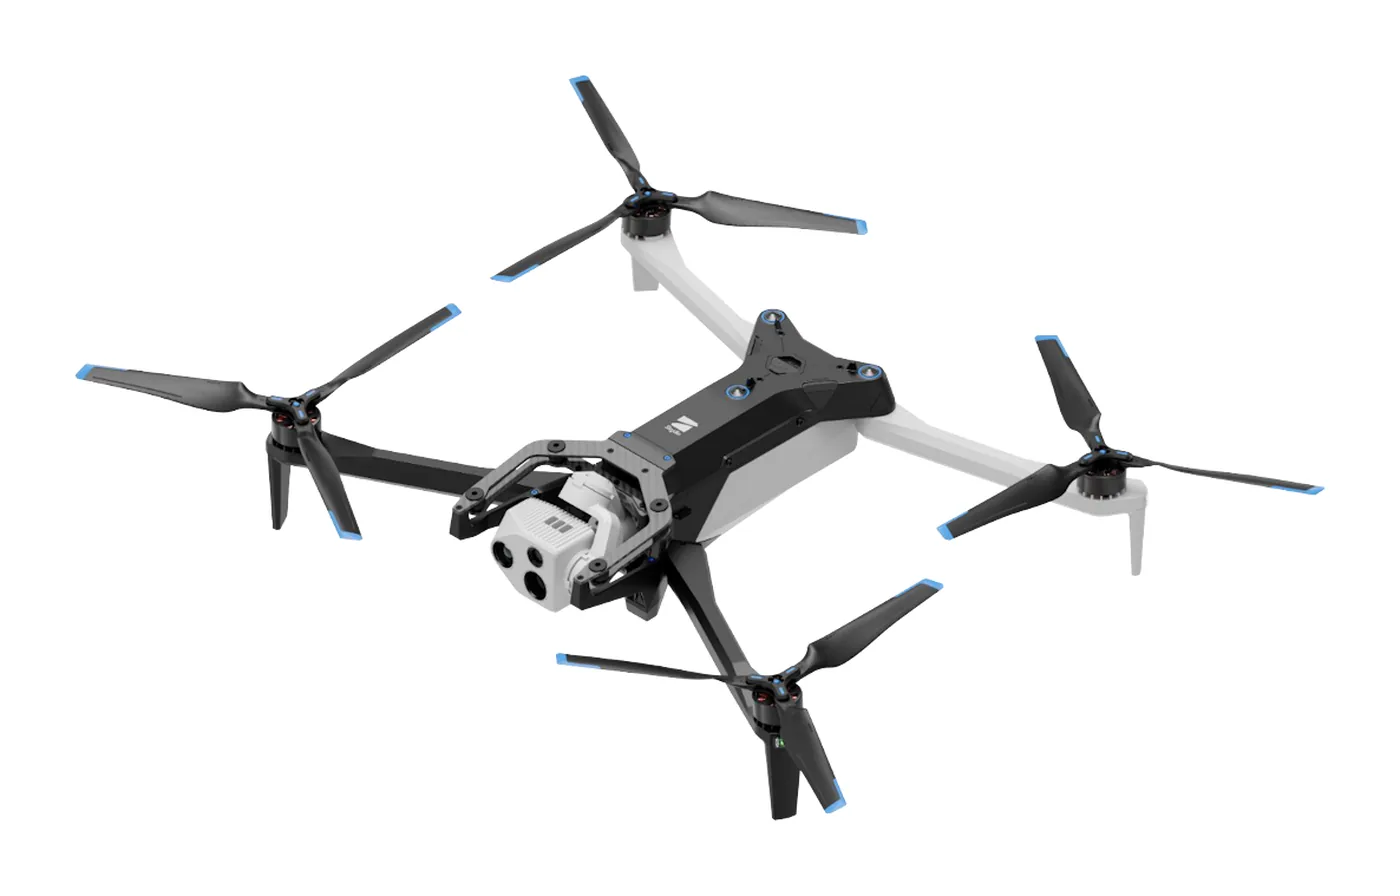
- Capture: photograph the building's exterior wall with a drone or ground camera.
- Load: import the captured images directly into CRITIR.
- Run orthoimage generation: one click runs camera pose estimation and 3D reconstruction. Choose the orthoimage you want from a few previews.
- Measure and report: place measurements and defect regions on the images → see them reflected on the orthoimage and drawings. Generate the report from the same app.
Frequently asked questions
- What is a facade (wall) orthoimage?
- An orthographic projection of a building's exterior wall viewed straight on. Multiple captures are stitched together and corrected for perspective distortion into a single plan-like image, used for facade inspection reports and defect mapping. It is called a facade or wall orthoimage to distinguish it from a standard ground-facing (horizontal) orthoimage.
- Can RealityCapture (RealityScan) or Metashape generate wall orthoimages?
- Both can produce them in principle and both publish workflows for doing so. Because they are general-purpose 3D reconstruction tools, however, walls usually require additional manual work — defining the projection plane, setting masks and ROIs, editing meshes, and so on — and getting a stable result takes some know-how.
- How long does it take to create a facade orthoimage?
- It depends on PC specs, but even for a building with 100–200 captures, the full pipeline from SfM through wall orthoimage generation typically completes automatically in tens of minutes to about an hour.
- Do I need a high-end PC?
- A supported GPU accelerates processing, but it is not required.
Wrap-up
In the general case, building a facade or wall orthoimage follows the pipeline captured photos → camera pose estimation → 3D geometry → orthographic projection onto a reference plane. In general-purpose tools like RealityScan and Metashape, however, manual work is the norm.
CRITIR solves this at the root.
- Generate facade orthoimages automatically from drone or ground-camera captures.
- Auto-projection of measurements so you can grasp the anomaly distribution on the orthoimage immediately.
- Connected to report output, all the way through to the base materials for a repair plan.
If analysis and reporting take too long, or if making wall orthoimages should just be simpler, please reach out via the contact form. Feature details are also available in the documentation.
Published: April 15, 2026 · Last updated: April 15, 2026
Analyze DJI thermal images directly in CRITIR, no conversion needed
Skip the conversion step for DJI R-JPEGs. CRITIR analyzes DJI thermal images directly, generates facade orthoimages, and produces reports — all in one app. Cut the cost and time spent on converter tools and conversion services.
Generate 3D Models from Drone Photos — Build Temperature-Colored (Thermal) 3D Models with CRITIR
Learn how to automatically generate 3D models of buildings and structures from drone or ground-camera photos. With CRITIR, you get a visible-light 3D model plus a temperature-colored thermal 3D model, all linked to measurements and report output — streamlining inspection documentation for complex facades, equipment, and solar panels.
Analyze Skydio X10 thermal images directly in CRITIR, no conversion needed
CRITIR now supports the Skydio X10 (VT300-Z payload). Read its FLIR Boson+ radiometric R-JPEG thermal images directly — no conversion — and run temperature analysis, facade orthoimage generation, measurement projection, and reporting in one app. Built for facade, solar, and infrastructure inspection workflows.