
Emissivity and reflected temperature on thermal cameras: why your readings don't match, and how to fix them
Thermal camera readings that disagree with a contact thermometer, windows and metal that look impossibly cold — most of the time it is not a faulty camera but emissivity and reflected temperature settings. This guide explains what a thermal camera actually measures, lists typical emissivity values by material, shows how to measure reflected temperature with aluminum foil, and covers distance and humidity, why metal and glass are hard, and how to correct the settings after capture.
Key points
- A thermal camera does not measure temperature — it measures how much infrared radiation reaches it. That radiation is a mix of the target's own emission, reflections of the surroundings, and emission from the air in between
- Emissivity and reflected temperature are the settings used to subtract the unwanted parts. On concrete or paint a small error barely matters; on metal or glass it can throw the reading off by tens of degrees
- You can measure reflected temperature on site with a sheet of aluminum foil. Outdoors under a clear sky it is often below 0 °C
- How precise you need to be depends on whether you care about temperature differences or absolute values — and with most radiometric formats, you can change the settings and recompute after capture
"The temperature is wrong" usually isn't a broken camera
Spend some time with a thermal camera and you will run into scenes like these:
- The camera and a contact thermometer disagree by several degrees or more
- A wall and its window should be the same temperature, yet the window shows up deep blue, below freezing
- A pipe or gutter that should be warm looks colder than everything around it
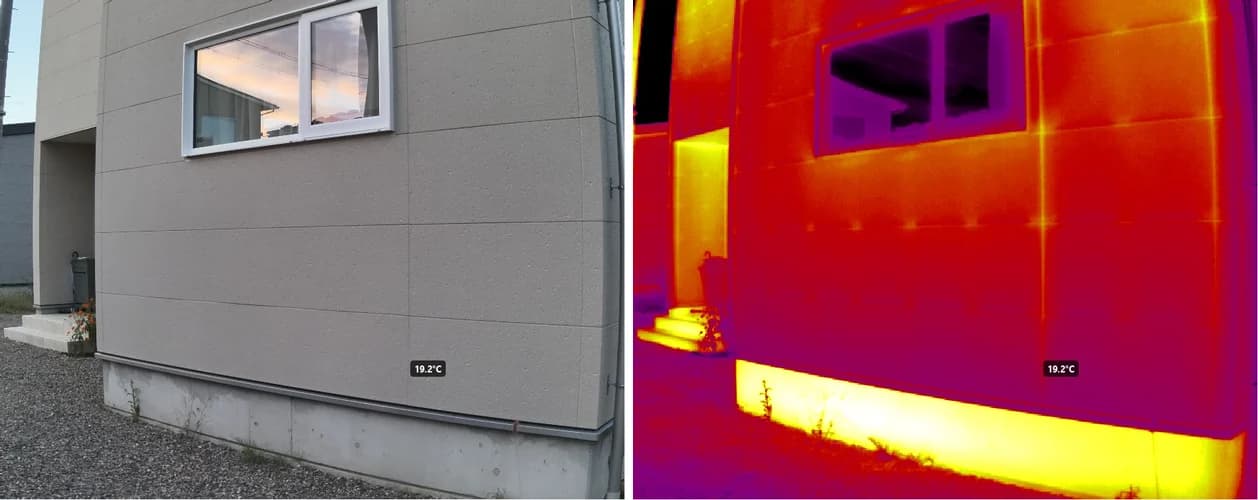
The photo above is exactly that. It is a house facade shot in the early evening, and only the window glass is dark purple. The room behind it is not cold. The camera is reading the sky and the house across the street reflected in the glass as if they were temperature.
Most of these discrepancies are not a hardware fault or a lack of accuracy. The cause is that the assumptions you give the camera — the emissivity and reflected temperature settings — do not match the object in front of it. This article untangles how that works and how to deal with it.
What does the camera actually measure? A mix of three sources
A thermal camera does not touch the target the way a thermometer does. What it measures is the amount of infrared (thermal) radiation reaching the lens, and that includes more than the target's own emission.
FLIR's technical reference treats the radiation reaching the camera as the sum of three terms:
- Emission from the object: set by the object's temperature and emissivity. This is the only part you actually want
- Reflected emission from the surroundings: radiation from the sky, nearby buildings, or the operator, reflected by the object's surface
- Emission from the atmosphere: the air between the camera and the object also emits a little infrared
Terms 1 and 2 are also slightly absorbed by the air on the way. The camera receives the total, estimates and subtracts terms 2 and 3, and computes temperature from what remains.
The settings decide how much gets subtracted. Emissivity sets the weights (coefficients) applied to terms 1 and 2, reflected temperature sets the strength of term 2, and distance, atmospheric temperature and relative humidity estimate term 3 and the absorption by the air. If the settings do not match reality, the subtraction is off, and so is the temperature.
Emissivity: the same temperature, a different glow
Emissivity (ε) is a value from 0 to 1 that describes how much infrared a surface emits compared with an ideal emitter (a blackbody) at the same temperature. For an opaque object, whatever it does not emit (1 − ε) is its reflectance.
Roughly, what the camera receives is "ε × (radiation for the object's temperature) + (1 − ε) × (radiation for the surroundings' temperature)." The lower the emissivity, the more weight falls on the reflected surroundings.
With concrete or tile, the wall's own emission carries a weight of 0.95 and reflection 0.05. With polished aluminum it is the other way around: reflection carries a weight of 0.95, so you are mostly seeing what is around it rather than its temperature. Note that the actual split of what arrives also depends on the object and surrounding temperatures, not just these weights (if the surroundings are a cold sky, for example, the reflected contribution is small).
Typical emissivity by material
These values are taken from the emissivity tables in FLIR's technical reference, picked for materials you meet in building and equipment inspections. Where the reference lists several values under different conditions, a range is shown.
| Material / surface | Typical emissivity |
|---|---|
| Concrete | 0.92–0.97 |
| Brick (common) | 0.81–0.94 |
| Mortar / plaster | 0.86–0.94 |
| Glazed tile | 0.94 |
| Porcelain (glazed) | 0.92 |
| Oil paint (various colors) | 0.92–0.96 |
| Wood (planed, pine, etc.) | 0.8–0.96 |
| Float glass (uncoated) | 0.97 |
| Water / ice | 0.95–0.98 |
| Snow | 0.8–0.85 |
| Human skin | 0.98 |
| Aluminum, polished | 0.04–0.06 |
| Aluminum, heavily oxidized | 0.2–0.3 |
| Aluminum, anodized, dull | 0.95–0.97 |
| Copper, polished | 0.02–0.03 |
| Copper, oxidized | 0.6–0.88 |
| Stainless steel, polished sheet | 0.14 |
| Galvanized iron sheet | 0.07–0.28 |
Emissivity tables are guidelines only. The same material varies with temperature, wavelength band, surface roughness, dirt and oxidation. FLIR's reference itself says the values "should be regarded as recommendations only and used with caution." If you need an exact value, measure it as described below.
Three things the table tells you
1. Facade materials sit almost entirely in the 0.9s. Concrete, mortar, tile and paint are all high, and about 0.95 is a common starting point. There is no need to agonize over emissivity for facade surveys.
2. For metals, the surface matters more than the metal. The same aluminum is around 0.05 polished, 0.2–0.3 heavily oxidized, and about 0.95 matte anodized. Memorizing a single number for "aluminum" is a trap.
3. Color does not matter. Oil paint is above 0.9 in the infrared regardless of its visible color. A white and a black coating at the same temperature glow the same in the infrared. Whether something looks white or shiny to your eye tells you nothing about its infrared emissivity.
Reflected temperature: the temperature of what the surface reflects
Reflected temperature is the apparent temperature of the surroundings reflected in the target surface. The camera uses it to subtract term 2.
Indoors, with no heat sources nearby, it is roughly the room temperature. Outdoors is where it gets tricky.
According to Testo's thermography guide, radiation from a clear sky — "cold sky radiation" — has an apparent temperature of around −50 to −60 °C. Because the sky covers so much of the view, the reflected temperature outdoors is usually below 0 °C, even on a sunny day. That is exactly why the window in the opening photo looked so cold.
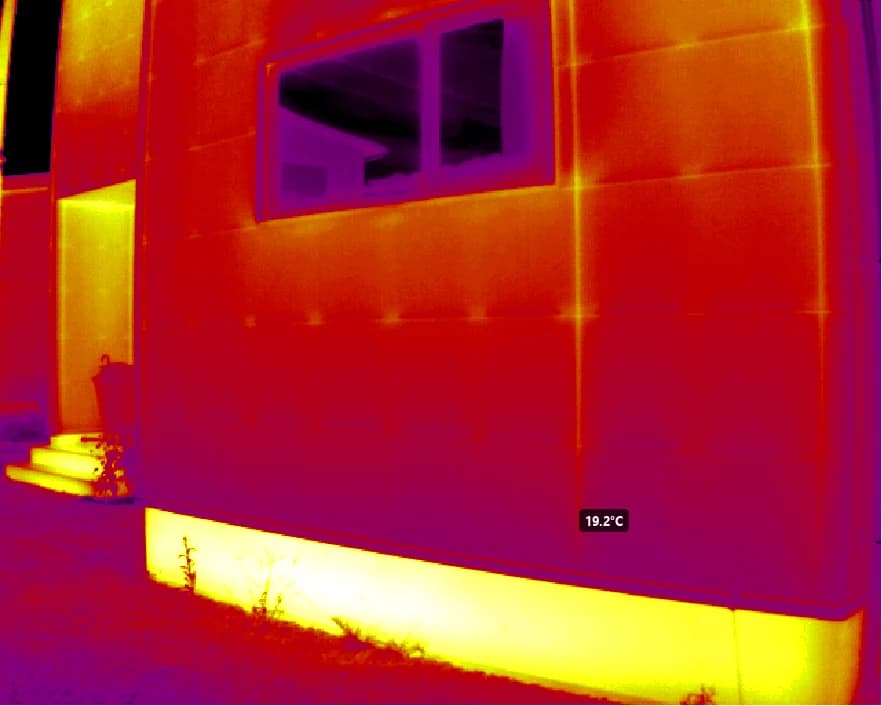
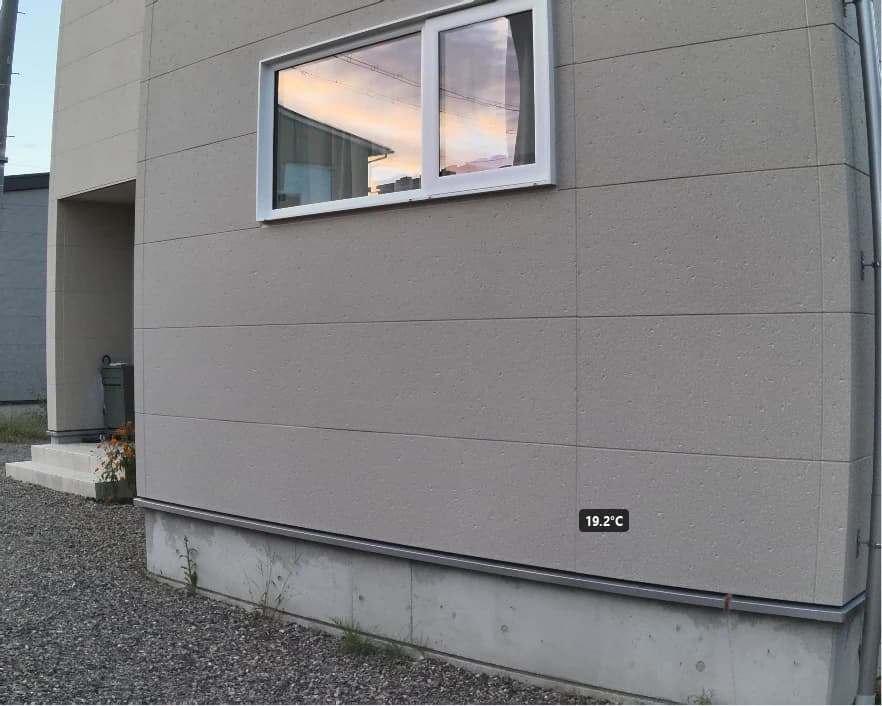
Testo lists an overcast sky as the ideal condition for outdoor thermography for this reason: clouds screen the object from both direct sunlight and cold sky radiation.
Measuring reflected temperature with a sheet of foil
You can measure reflected temperature with ordinary materials. Both FLIR's and Testo's references describe the crumpled aluminum foil method.
- Crumple a sheet of aluminum foil, flatten it out again, and attach it to a piece of cardboard of the same size
- Place it right in front of the target (ideally on the target surface), with the foil facing the camera
- Set the camera's emissivity to 1.0 and read the foil's temperature
- Enter that value as the reflected temperature, set emissivity back to the target's value, and measure
Aluminum foil reflects almost all infrared. Crumpling it breaks up the mirror-like reflection into an average of the whole surroundings. A flat sheet would reflect only whatever happens to be directly opposite — often your own body.
FLIR's reference notes that you cannot measure reflected temperature with a thermocouple or other contact thermometer. A contact thermometer measures an object's temperature; reflected temperature is an apparent radiation intensity — a different quantity.
Distance, air temperature and humidity: the air in between matters a little
The remaining three settings account for the air between the camera and the target.
- Distance: affects how much of the object's radiation the air absorbs, and how much the air itself emits
- Relative humidity: more water vapor means more absorption. FLIR's reference says that for short distances and normal humidity, the default of 50% is usually fine
- Atmospheric temperature: used to estimate how much the air itself emits
When you shoot a facade from a few meters away, these three matter far less than emissivity and reflected temperature. When you fly a drone farther out, or the air and the target are at very different temperatures, entering real values is the safer choice.
Dense fog, steam and condensation on the lens cannot be corrected by settings. Testo's guide advises against measuring in thick mist, above water vapor, or while condensation is forming on the camera.
Why are metal and glass so hard?
With all that in place, the trouble with metal and glass becomes clear.
Metal: reflection takes over
Polished metal has an emissivity below 0.1. More than 90% of what reaches the camera is reflection, so the tiniest error in the settings throws the temperature far off.
To see how far, we ran a simple model (8–14 µm band, atmosphere ignored): a piece of polished aluminum (ε = 0.05) at 60 °C, measured in a room at 20 °C.
| Camera settings | Displayed temperature |
|---|---|
| ε 0.95, reflected 20 °C (left on the facade setting) | ≈ 22 °C |
| ε 0.05, reflected 20 °C (correct) | 60 °C |
| ε 0.05, reflected 15 °C (5 °C off) | ≈ 116 °C |
| ε 0.05, reflected 25 °C (5 °C off) | ≈ −54 °C |
Left on the facade setting, a 60 °C object reads as roughly room temperature. Even with the right emissivity, a 5 °C error in reflected temperature swings the reading by more than 50 °C. Measuring the absolute temperature of polished metal with infrared is that fragile.
The practical fix is to read the temperature on a surface of known emissivity. To determine emissivity, FLIR's reference describes applying electrical tape of known emissivity (usually about 0.97) and comparing against it. Testo's guide also notes that painted metal is unproblematic to measure. Read the temperature on the tape or on a painted area.
Glass: you can't see through it, and it's a mirror
Glass is transparent to the eye, but it is practically opaque to long-wave infrared. The camera sees the glass surface, not what is behind it.
Glass is also smooth, so it reflects its surroundings like a mirror. Even with a fairly high emissivity value, the cold sky and the buildings opposite show up sharply. The window in the opening photo is a textbook case.
Tip
If you can't tell whether something is a reflection, move and shoot again from a different position. As Testo's guide points out, reflections move with your viewpoint, while the object's own thermal pattern stays in the same place.
Looking at temperature differences? Then settings errors matter much less
At this point you might worry that any small mistake ruins everything. But how precise you need to be depends heavily on what you want to know.
Take delaminated facade tiles, where you look for anomalies by their difference from the surroundings. The table below is a worked example (same simple model as above): a wall with two spots truly at 30 °C and 35 °C (ε 0.95, reflected −20 °C for a clear sky), read with different settings.
| Camera settings | 30 °C spot | 35 °C spot | Difference |
|---|---|---|---|
| ε 0.95, reflected −20 °C (correct) | 30.0 °C | 35.0 °C | 5.0 °C |
| ε 1.00, reflected 20 °C | 28.0 °C | 32.9 °C | 4.8 °C |
| ε 0.90, reflected 20 °C | 28.9 °C | 34.2 °C | 5.3 °C |
With wrong settings, the absolute readings move by 1–2 °C. The difference stays at roughly 5 °C. On a high-emissivity facade, the pattern — which areas are warmer than their surroundings — barely depends on the settings.
On the other hand, you do need settings that match actual conditions when you:
- Report absolute temperatures, or judge pass/fail against a threshold
- Compare temperatures with images from another day or another camera
- Read the temperature of low-emissivity or highly reflective objects such as metal and glass
And within a survey, keep the settings consistent. If every image has different settings, you can no longer tell whether a difference in the report is real or just a settings artifact.
You can fix it afterwards: the image keeps the raw ingredients
Forgot to measure reflected temperature on site? Shot a metal part with the facade settings? In many cases you don't need to reshoot.
FLIR radiometric JPEGs and DJI R-JPEGs do not bake a finished temperature into the image. They store the original data needed to compute temperature, together with the settings used at capture. Compatible software can swap in new settings and recompute.
Thermal Parameters in CRITIR
In the thermal image analysis software CRITIR, the Thermal Parameters panel on the right lets you change five settings after capture and recompute temperatures. It currently works with FLIR and DJI thermal images.
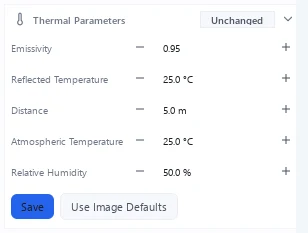
- Edit emissivity, reflected temperature, distance, atmospheric temperature and relative humidity and press Save to recompute temperatures. Images that already have measurements get those values recomputed too
- Settings apply to all images from the same camera model within a set, which makes it easy to keep a survey consistent
- Use Image Defaults restores the values recorded at capture at any time
- Values CRITIR had to estimate because the image did not record them are marked "(Estimated)"
The screenshot above is from the DJI image of the house in the opening photo, taken outdoors in the early evening. The reflected temperature recorded in the image was 25.0 °C. For an outdoor facade reflecting a clear sky, the real value would be lower. That doesn't matter if you only look at temperature differences on the wall, but if you report absolute temperatures you would correct it to the site value first.
Thermal parameters cannot be changed for images captured in DJI thermal cameras' High Res mode — they are fixed by the capture settings. Temperatures are shown as reference values, and relative temperature differences can still be compared.
See Thermal analysis — Thermal parameters for the full procedure, and Shooting tips — Emissivity and reflected temperature for what to set before you shoot.
Frequently asked questions
- What emissivity should I set?
- It depends on the material and its surface. Most building facade materials — concrete, mortar, tile, painted surfaces — are in the 0.9s, and around 0.95 is a common starting point. Table values are only guidelines, though; the same aluminum can be around 0.05 when polished and around 0.95 when it is matte anodized. If you need an accurate value, measure it by comparing against a piece of tape with known emissivity.
- What is reflected temperature and how do I measure it?
- It is the apparent temperature of the surroundings (sky, buildings, people) reflected by the target surface. The camera subtracts this reflected portion when it computes the target temperature. The common method is to crumple a sheet of aluminum foil, flatten it onto cardboard, place it right in front of the target, set the camera's emissivity to 1.0, and read the foil. Enter that value as the reflected temperature. Outdoors under a clear sky, the reflected temperature is often below 0 °C.
- Why does my thermal camera disagree with a contact thermometer?
- Usually because emissivity and reflected temperature do not match the actual conditions. The camera works backwards from the amount of infrared radiation reaching it, so if it misjudges how much of that radiation is reflected from the surroundings, the temperature is off. The error is largest on low-emissivity metal and on glass that reflects the sky. Over long distances or in fog or steam, the atmosphere adds further error.
- If I set the wrong emissivity in the field, do I have to reshoot?
- Not if the format stores the information needed to compute temperature, such as FLIR radiometric JPEGs or DJI R-JPEGs. Compatible software can recompute temperatures with new emissivity and reflected temperature values. In CRITIR, FLIR and DJI images can be recomputed from the Thermal Parameters panel. Images captured in DJI High Res mode cannot be changed.
- Does emissivity matter for detecting delaminated facade tiles?
- Delamination is judged from temperature differences against the surroundings, so a slightly wrong emissivity or reflected temperature has little effect on those differences and limited effect on detection. If you report absolute temperatures, or compare temperatures across surveys or images, set the parameters to match actual conditions and keep them consistent within a survey.
Summary
- A thermal camera receives object emission + reflected surroundings + atmospheric emission. Emissivity, reflected temperature, distance, air temperature and humidity are the settings used to subtract the extra parts
- Facade materials are almost all in the 0.9s, so for surveys based on temperature differences, settings errors matter little
- On metal and glass, reflection dominates. On polished metal, a few degrees of error in reflected temperature means tens of degrees of error in the reading. Read on tape or paint
- Reflected temperature can be measured on site with aluminum foil and emissivity set to 1.0. Outdoors under a clear sky it is often below 0 °C
- For FLIR and DJI images, you can change the settings and recompute after capture
CRITIR reads thermal images from DJI, FLIR and other cameras without conversion, and takes you from temperature measurement to facade orthoimages and reports in a single application. Learn more on the CRITIR product page.
Sources
- FLIR Systems, Reference documentation: Thermography (T810442) — measurement formula (object, reflected and atmospheric terms), direct and reflector methods for reflected apparent temperature, determining emissivity, relative humidity and distance, emissivity tables — PDF
- Testo, Thermography Pocket Guide: Theory – Practice – Tips & Tricks — cold sky radiation (−50 to −60 °C) and outdoor reflected temperature, aluminum foil method, glass, metal and reflections, humidity, fog and condensation — PDF
- ISO 18434-1:2008, Condition monitoring and diagnostics of machines — Thermography — Part 1: General procedures (includes procedures for determining and compensating for reflected apparent temperature, emissivity and attenuating media) — ISO
- The worked examples (polished aluminum, facade temperature difference) were computed by the CRITIR team by integrating Planck's law over 8–14 µm with a simple model that ignores the atmosphere. They will not match any specific camera exactly.
Published: October 7, 2026 / Last updated: October 7, 2026
Why thermal cameras can find delaminated facade tiles, and why the pattern flips at night
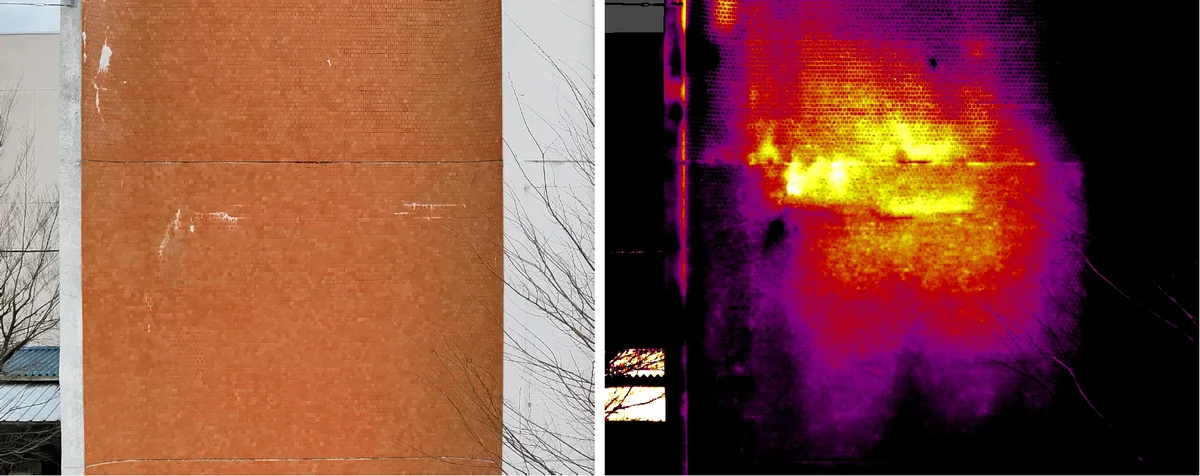
How infrared surveys detect debonded (delaminated) facade tiles, explained with diagrams and real thermal images. Why a delaminated area looks warmer by day and cooler after sunset, the conditions that hide the contrast (overcast skies, north faces, shade, wind), the usual causes of false positives (reflections, color, materials, equipment heat) and how to rule them out, and how infrared relates to hammer tapping.
Analyze DJI thermal images directly in CRITIR, no conversion needed
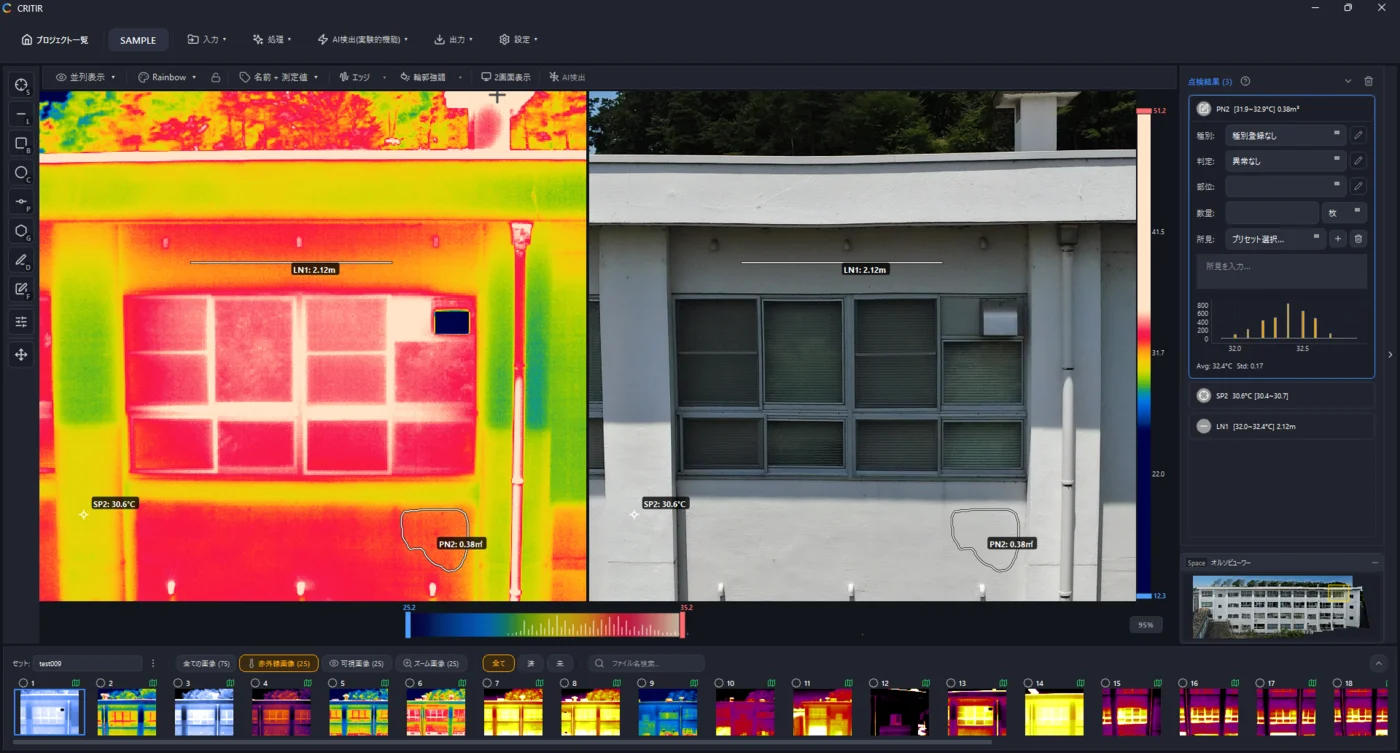
Skip the conversion step for DJI R-JPEGs. CRITIR analyzes DJI thermal images directly, generates facade orthoimages, and produces reports — all in one app. Cut the cost and time spent on converter tools and conversion services.
Generate facade and wall orthoimages automatically with CRITIR
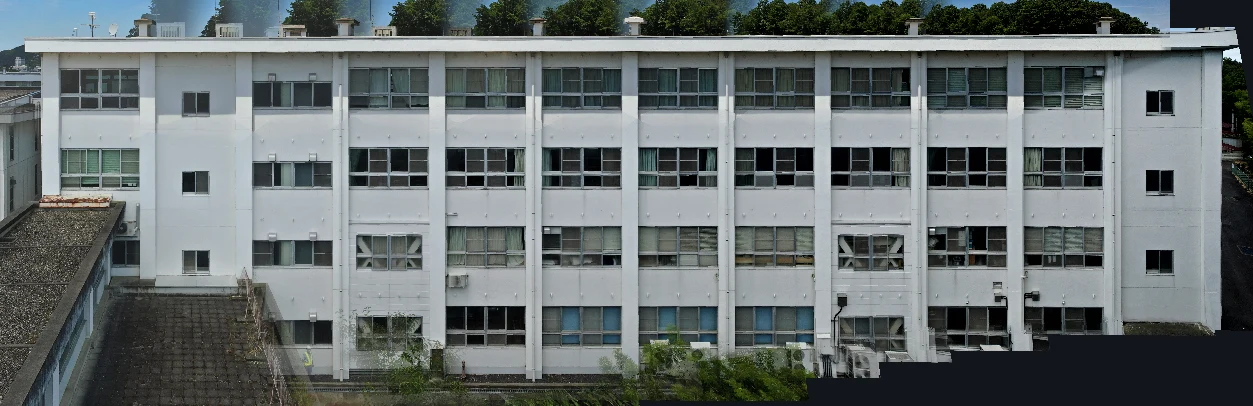
A clear walkthrough of how facade and wall orthoimages are built from drone or ground-camera shots, and how CRITIR simplifies the process. Where RealityCapture (RealityScan) and Metashape require significant manual work for vertical surfaces, CRITIR automates the pipeline — including thermal orthoimages — to streamline facade inspections and defect surveys.